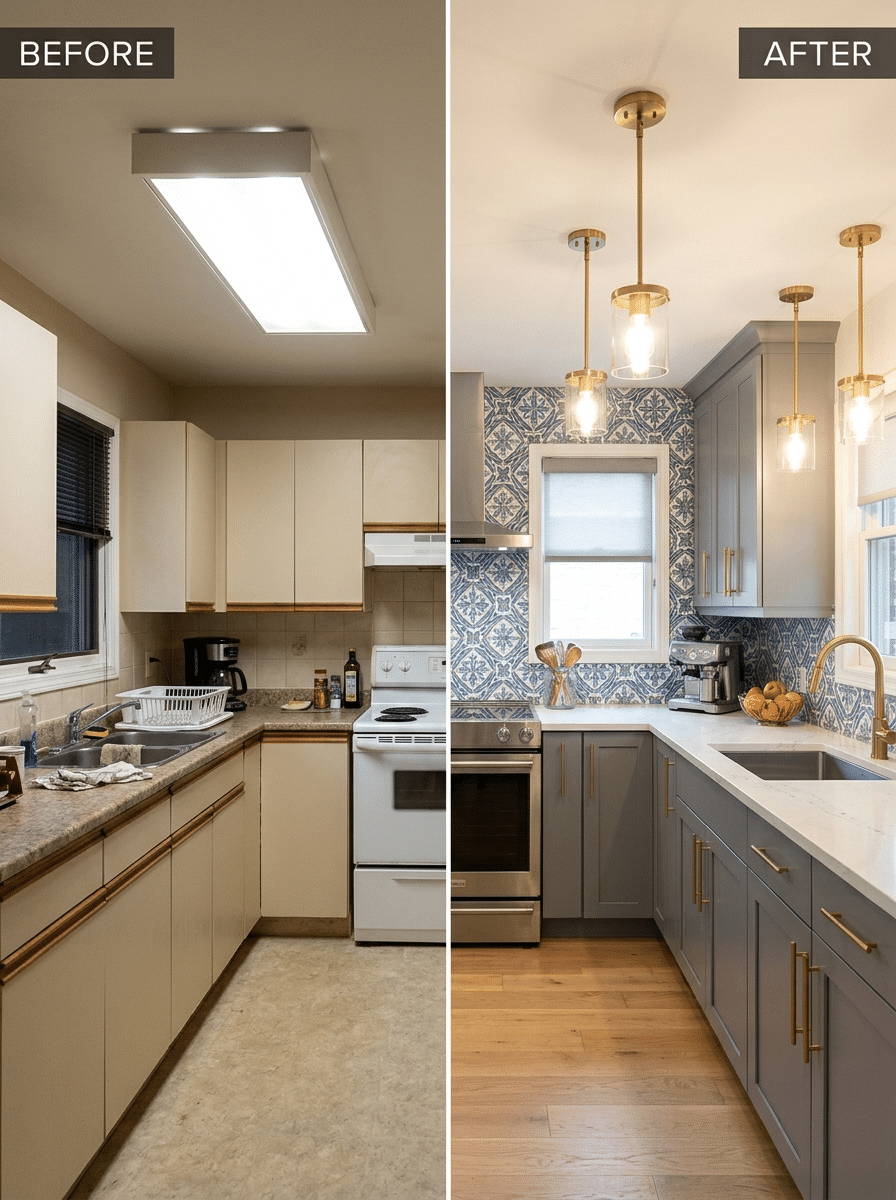
A kitchen makeover before and after can look like magic, but the best ones rarely come from tearing everything out. Many of the most striking transformations keep the same layout, the same plumbing, and even the same appliances. What changes is the paint, the hardware, the lighting, and a handful of smart upgrades that make the room feel brand new.
If your kitchen feels dated, beige, or just worn out, you do not need a full remodel to fix it. This guide covers 10 simple kitchen upgrades that deliver big visual change for a fraction of the price. You will see what to change, why it works, what to watch out for, and how to plan the order so you do not waste money. Along the way, you will find kitchen makeover ideas drawn from real renovation projects, including a seaside home, a family kitchen with gray cabinets and a bold tile wall, and a builder grade kitchen that gained warmth with new floors and counters.
Kitchen Cabinet Makeover Before and After: Paint, Pulls, and Doors
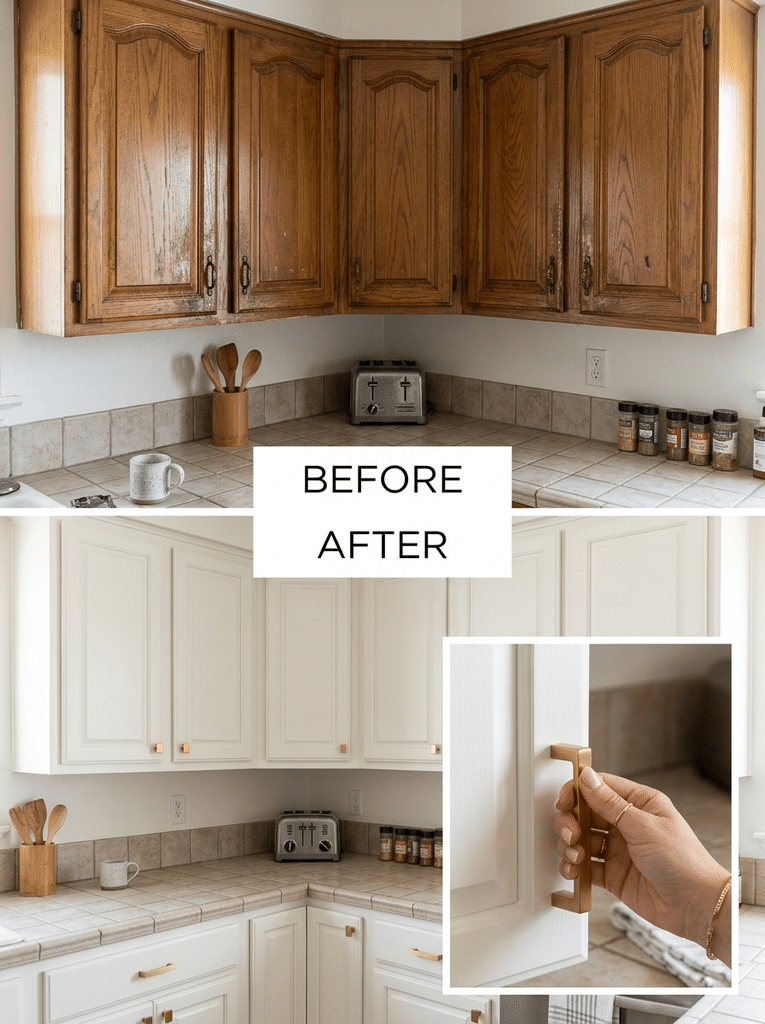
Cabinets take up the most visual space in any kitchen. When they look tired, the whole room looks tired. That is why a kitchen cabinet makeover is the first stop for almost every budget project.
1. Paint the Cabinets
Painting is the single biggest bang for your money. New cabinets can cost many thousands of dollars, while paint and supplies often come to a few hundred. In one family kitchen makeover, light gray cabinet paint turned a beige, dated room into a clean and modern one without replacing a single box.
For a finish that lasts, prep matters more than the paint color. Here is the basic process:
- Clean: Wipe every door and frame with a degreaser. Kitchens collect grease you cannot always see, and paint will not stick to it.
- Sand and prime: Lightly sand the surface, then apply a bonding primer made for glossy or wood surfaces.
- Paint: Use a cabinet enamel or a durable urethane trim paint. Two thin coats look better than one thick coat.
- Cure: The paint may feel dry in a day, but it can take a few weeks to fully harden. Be gentle during that time.
Color choice changes the mood. Soft gray and warm white feel calm and modern, deep green or navy feels rich, and a darker shade on a lower island can add contrast. Test your sample on the actual cabinet and look at it at different times of day. Your light bulbs also change how paint looks, since warm bulbs can make gray read greener or yellower than it did in the store.
2. Swap the Cabinet Hardware
New pulls and knobs are one of the cheapest kitchen upgrades, and they have a surprising effect. Brushed brass or champagne bronze adds warmth to cool gray and white cabinets. Matte black looks crisp and modern, and polished chrome suits a clean, high shine look. In one renovation, the owner credited the brass hardware with giving the room warmth and a more finished feel.
Before you order, measure the distance between the screw holes on your current pulls, since the most common sizes are 3 inches and 3.75 inches. Matching that spacing means you will not need to fill and redrill holes. If you want to switch from a cup pull to a bin pull, check how the new pull will sit, because the hole position may change where it ends up on the door. Buy one sample first, hold it up, and make sure it feels good in your hand.
3. Update the Cabinet Doors and Storage
If your cabinet boxes are solid but the doors look dated, you can replace only the doors. One homeowner kept her original cabinet boxes and swapped short, arched doors for taller, simple ones. That small shift made the proportions look more balanced and gave the kitchen a custom feel. Going all the way to the ceiling also adds storage and removes the dusty gap on top.
Storage upgrades matter just as much as looks. Many people who have lived with deep lower shelves wish they had drawers instead, because drawers let you see everything without kneeling and digging. If you are replacing any lower cabinets, ask about drawer fronts or pull out shelf kits. Solid doors on the upper cabinets also hide clutter better than glass, so you do not have to keep every plate perfectly arranged.
Surfaces That Make a Kitchen Look New: Backsplash, Counters, and Floors
Once the cabinets look good, the surfaces around them decide whether the room feels polished or patched together.
4. Add a Bold Backsplash
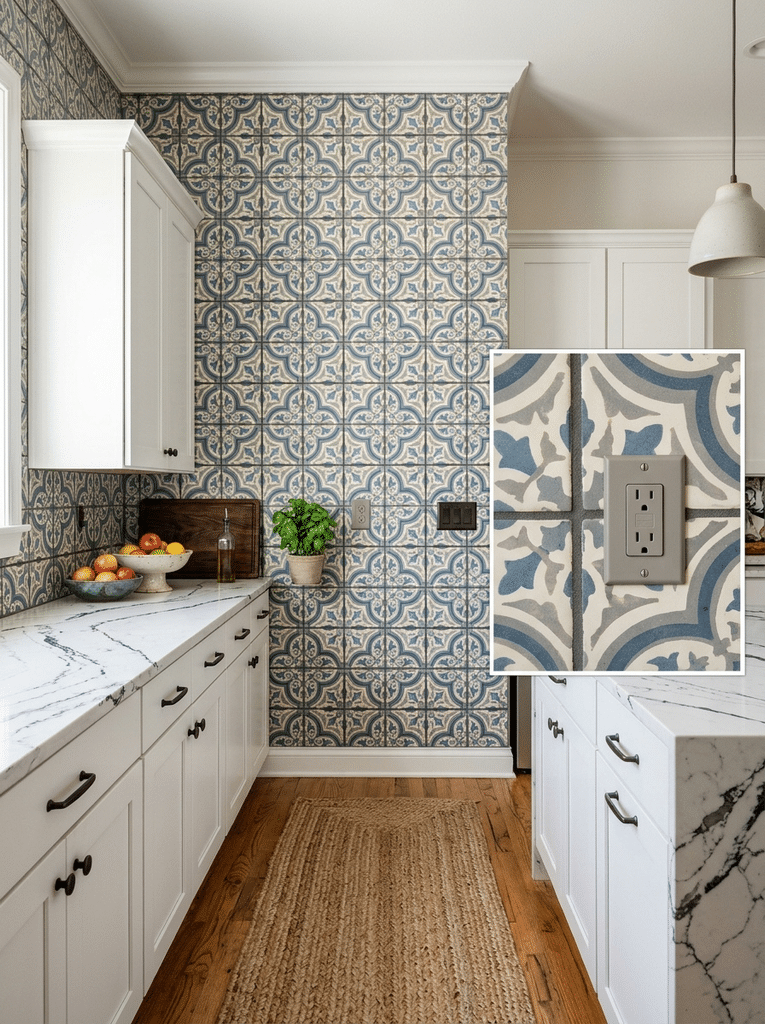
A new backsplash changes the personality of a kitchen quickly. Patterned cement look tile adds charm, classic white subway tile feels clean and bright, and a textured handmade tile looks warm and relaxed. In one kitchen, the owners extended a bold patterned tile all the way to the ceiling. They worried it might feel like too much, but the full height tile became the best part of the room.
A few practical tips help the project go smoothly:
- Run it higher: Taking tile to the underside of the upper cabinets looks fine, but taking it to the ceiling looks custom.
- Avoid awkward stops: Carry the tile past the end of a wall or behind the fridge so the pattern does not end in a strange spot.
- Match the grout: A grout color close to the tile makes busy patterns calmer. Contrast grout creates a graphic grid.
- Move the outlets: Lowering outlets closer to the counter and painting them to match the tile helps them disappear. Have an electrician handle this if you are not experienced.
If you are renting or want a lower cost option, peel and stick tile is a real choice. It will not last as long as ceramic, but it can look good for a few years and costs much less.
5. Refresh or Replace the Countertops
Countertops anchor the look of the room. If your budget allows only one bigger purchase, this is a good place to spend it. Quartz is popular because it resists stains and does not need sealing, and some patterns include dark veining with tiny copper or silver flecks that look a lot like granite. Honed marble gives a soft, upscale look, but it can stain and etch, so it suits people who do not mind a lived in finish.
Several budget friendly options also work well. Butcher block adds warmth and costs less than stone, though it needs regular oiling. Laminate has improved a lot and now comes in convincing stone looks. For a small kitchen or a bar area, ask a stone yard about remnants, which are leftover slabs sold at a lower price. If your current counters are in good shape, a deep clean, a new sealer, and a new backsplash may be all you need.
6. Install New Flooring or Add a Runner
Floors affect the whole feel of the room. One family replaced worn builder grade flooring with warm acacia hardwood, and the room went from beige and boring to warm and inviting, even though the cabinets and layout stayed the same. Hardwood is not the only choice, though. Luxury vinyl plank costs less, handles water well, and comes in realistic wood looks. Tile is durable but feels hard and cold under your feet.
If you cannot replace the floor, a runner does a lot of the work. A jute or sisal runner adds texture and softens the room, and it hides small marks from daily use. Choose a flat weave with a rug pad so it stays put and does not trip anyone. Measure the walkway so the runner leaves a few inches of floor showing on each side.
Lighting, Sink, and Fixtures: Small Changes With Big Results
Fixtures are easy to ignore, but they are the details people notice every day.
7. Upgrade the Lighting, Including That Old Fluorescent Light Box
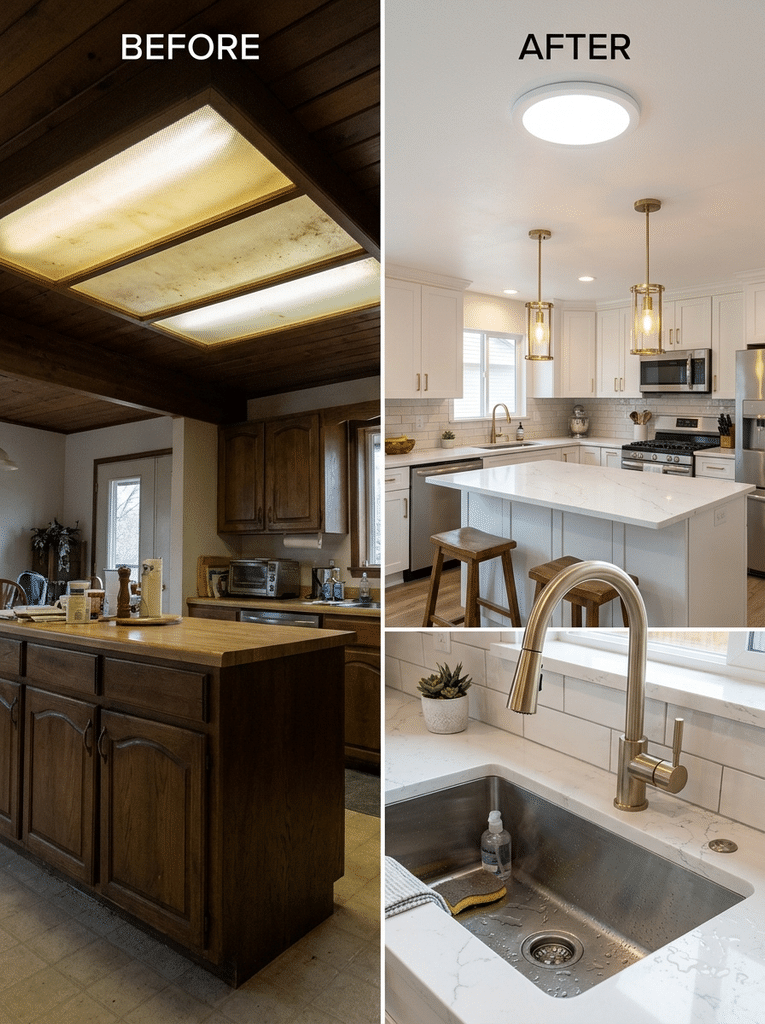
Bad lighting makes a good kitchen look cheap. A fluorescent light box on the ceiling gives a flat, bluish glow and often has yellowed covers. Replacing it is one of the most dramatic before and after kitchen fluorescent light box makeovers you can make. Here are three ways to do it:
- Swap in a flush mount LED fixture. This is the easiest option and works in most kitchens.
- Install recessed LED lights. A set of slim recessed lights gives a clean look, though you may need an electrician and some drywall repair.
- Replace the covers only. If the box is recessed in a dropped ceiling, new diffuser panels or a flat LED panel can modernize it without cutting into the ceiling.
Turn off the power at the breaker before you touch anything, and call an electrician if you are unsure about the wiring.
Pendants over the island are another high impact choice. One homeowner used a recessed light converter, which let her hang pendant lights in the same spot as the old recessed fixtures with no rewiring or ceiling patching. Hang pendants about 30 to 36 inches above the counter so they do not block anyone’s view. Match the style across the room by swapping the shades on a nearby chandelier or dining fixture if you can.
Finally, choose your bulbs with care. Warm white bulbs in the 2700K to 3000K range feel cozy, while 3500K to 4000K gives a brighter, cleaner look that many cooks prefer. Add under cabinet lights to brighten the counters where you actually chop and prep.
8. Replace the Sink and Faucet
A new sink and faucet make the kitchen feel fresh and work better every day. A deep, single bowl undermount sink gives you room for large pots and baking sheets, and it is easy to wipe the counter straight into the bowl because there is no rim. Stainless steel is durable and affordable, while a fireclay or composite sink adds a more custom look.
Choose a faucet finish that ties in with your hardware. Champagne bronze or brass pairs well with warm cabinet pulls, and matte black suits a modern room. Pull down sprayers and touch activated faucets save effort when your hands are covered in food. Check the sink cutout size and mounting style before you buy, since a new undermount sink needs a counter that can be cut or already has the right opening.
Layout Tweaks and Finishing Details That Make It Feel Custom
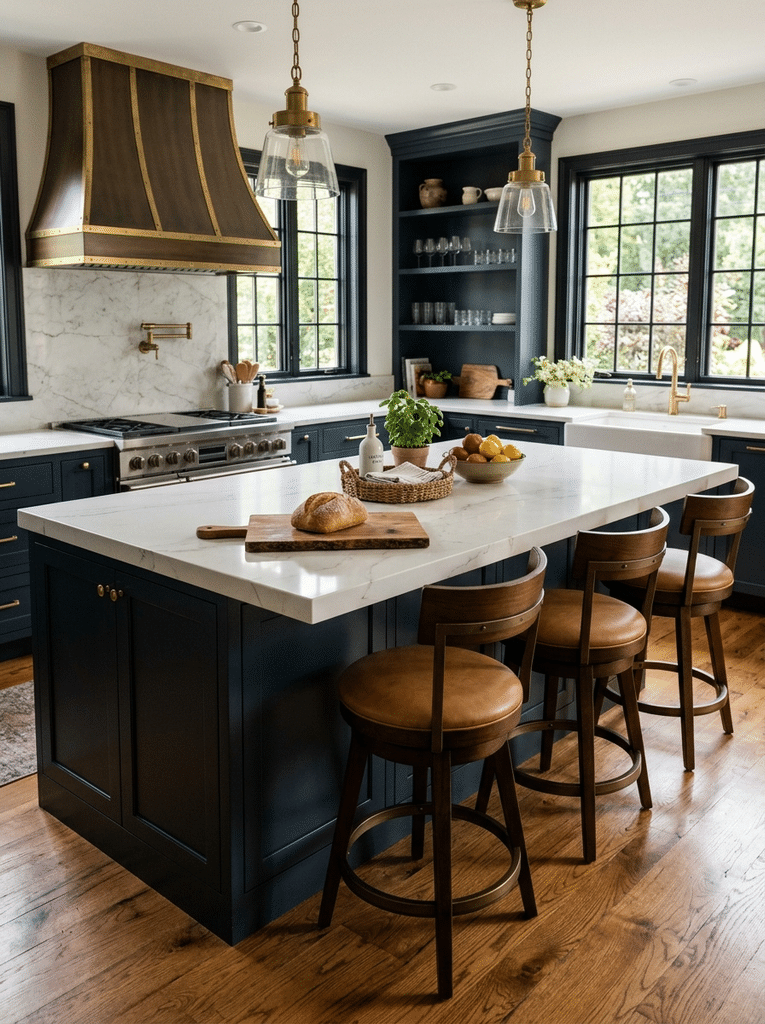
You can improve how a kitchen works without moving walls or plumbing lines. These two ideas add function and polish.
9. Extend the Island or Add Seating
If your kitchen has room, a larger island can change how the space gets used. One homeowner added a stock cabinet to the end of an existing island. She used an upper wall cabinet, set on a hidden platform and covered by baseboard trim, which gave her extra shallow storage in the space she had. She then extended the counter overhang on two sides so more people could sit.
If you want seating, leave about 12 inches of overhang for knees at counter height, and allow about 24 inches of width per stool. Keep a clear walkway of at least 36 inches, and 42 inches if you can, around the island. Swivel bar stools with backs make longer conversations more comfortable. You can also paint the back of the island a color that echoes your backsplash so the new piece looks planned.
No room for a bigger island? A rolling cart or a narrow console table can give you the same extra prep space and storage.
10. Dress Up the Hood, Windows, and Small Details
Details are where a budget makeover starts to feel expensive. One homeowner added brass trim around the vent hood for under $200, and she called it the best value in the whole project. She bought the metal trim, buffed it to the finish she wanted, and had her contractor attach it. This is also a creative way to explore stylish range hood ideas without replacing the entire hood. Painting window trim a dark color, such as charcoal or black, can also make the windows look like a design feature and tie in with other dark accents.
Here are more small updates to consider:
- Hide the clutter. A kitchen that looks calm is easier to keep clean. Use trays, jars, and baskets so countertop items look intentional. Panels that match the cabinets can also hide a dishwasher or fridge, which gives a built in look.
- Add a shelf above the stove. A simple shelf running wall to wall gives you storage and a place for pretty dishes.
- Keep your appliances if they work. In several of these projects, the owners kept their existing appliances because they were still in good shape and replacing them was not worth the cost.
- Add texture. Wood cutting boards, woven baskets, and a jute runner soften shiny surfaces and add warmth.
In a seaside kitchen makeover, the designer mixed high sheen cabinets, honed marble, and chrome hardware with rougher natural materials like reclaimed wood and plaster. The contrast between sleek and natural materials is a good rule to borrow. If everything is shiny, the room feels cold, and if everything is rustic, it can feel heavy.
Budget Kitchen Makeover Ideas: How to Plan and Where to Spend
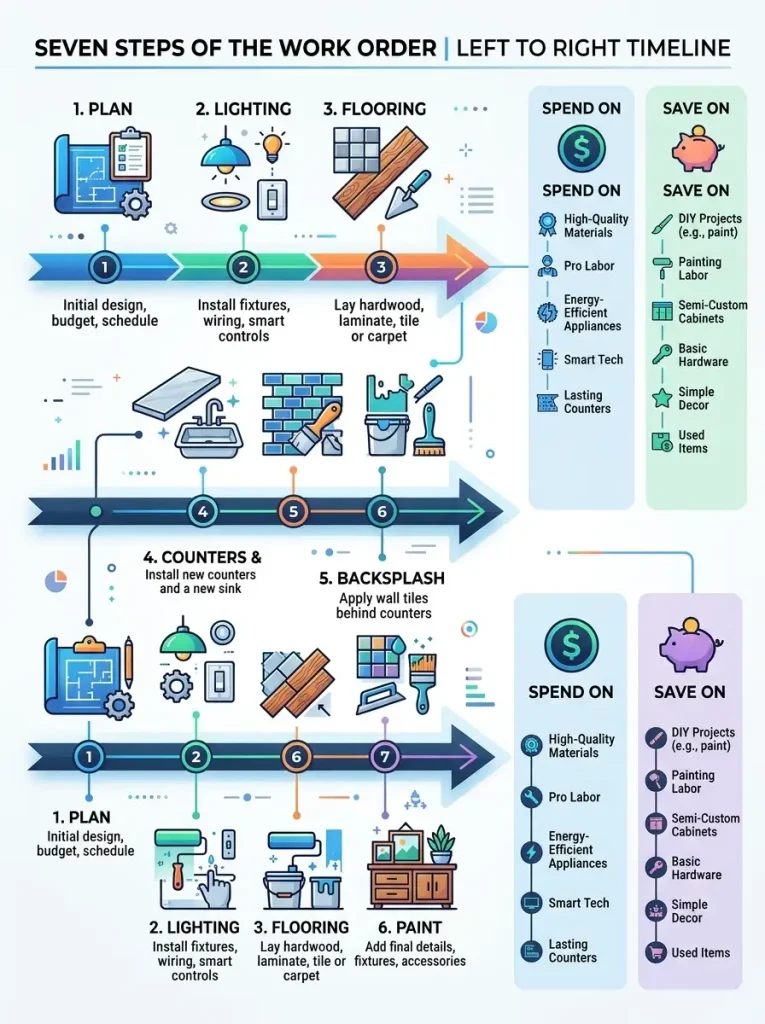
A good plan keeps a kitchen makeover without remodeling from turning into a pile of half-finished projects. Whether you’re aiming for a simple refresh or a minimalist kitchen design, use the steps below to decide what to do first.
Do the Work in the Right Order
The order matters because later steps can damage earlier ones. A typical sequence looks like this:
- Plan and budget. Write down what bothers you most and what you can live with.
- Electrical and lighting. Do any wiring, outlet moves, and ceiling work before you paint.
- Flooring. Install new floors before cabinets if you want them to run under the base.
- Countertops and sink. These need to be fitted before the backsplash.
- Backsplash. Tile goes in after counters.
- Paint cabinets and walls. Paint late so it does not get scratched.
- Hardware, accessories, and decor. Finish with the fun details.
Where to Spend and Where to Save
Spend on: countertops, flooring, a good sink, and quality paint and primer. You touch these every day, and they take the most wear.
Save on: cabinet hardware (affordable styles look great), pendant lights, accessories, and a peel and stick backsplash if you plan to sell or move soon.
Keep: your layout, plumbing, and working appliances. Moving gas, water, or drain lines is where costs climb fast. Several of the best before and after kitchens here changed nothing behind the walls, and the results still look like a major project.
Mistakes to Avoid
- Skipping prep. Cabinet paint peels when you do not clean and prime first.
- Choosing timid options. If you love a bold tile or color, trust yourself. Play it safe in the big, permanent pieces and be bold where it is easy to change.
- Buying before measuring. Check hardware spacing, sink cutouts, and rug sizes first.
- Ignoring light. Test paint and tile samples near the window and under your bulbs.
- Overspending on trends. Pick finishes you will still like in five years.
If you plan to hire out part of the work, such as countertops or electrical, get at least three quotes and ask for photos of past kitchen projects. Ask each pro about timelines too, so you are not cooking on a hot plate for six weeks.
Frequently Asked Questions
How much does a kitchen makeover cost?
It depends on the size of the room and how many updates you choose. A paint and hardware refresh can cost a few hundred dollars, while adding new counters, flooring, and lighting pushes the cost into the thousands. A full remodel costs far more, which is why many homeowners choose a staged makeover.
What is the cheapest way to update a kitchen?
Painting the cabinets and replacing the hardware gives the biggest change for the lowest cost. Adding a new light fixture and a backsplash comes next. These updates take only a few days of work if you do them yourself.
Can I do a kitchen remodel without renovation or moving walls?
Yes. Most of the updates in this article keep your layout, plumbing, and appliances in place. You can change the cabinet color, hardware, backsplash, lighting, sink, and floors without any demolition.
How long does a kitchen makeover take?
A simple paint and hardware project can take a long weekend or a week, depending on drying time. A makeover that includes new counters, flooring, and tile may take three to six weeks. Keep in mind that paint needs time to cure fully.
Should I paint or replace my kitchen cabinets?
Paint them if the boxes are solid and the layout works for you. Replace them if the cabinets are damaged, water warped, or poorly arranged. Replacing only the doors and adding new hardware is a good middle option.
What is the best way to do a kitchen makeover on a budget?
The best budget kitchen makeover starts with small, affordable changes. Paint cabinets, replace handles, update lighting, and add a new backsplash. These simple upgrades make your kitchen look fresh without spending too much money.
Conclusion
A kitchen makeover before and after does not have to mean a huge budget or a month without a stove. By painting cabinets, updating hardware, adding a standout backsplash, upgrading the lighting, and choosing a few quality fixtures, you can change how your kitchen looks and feels. Keep the layout, spend on the things you touch every day, and plan your steps in a smart order.