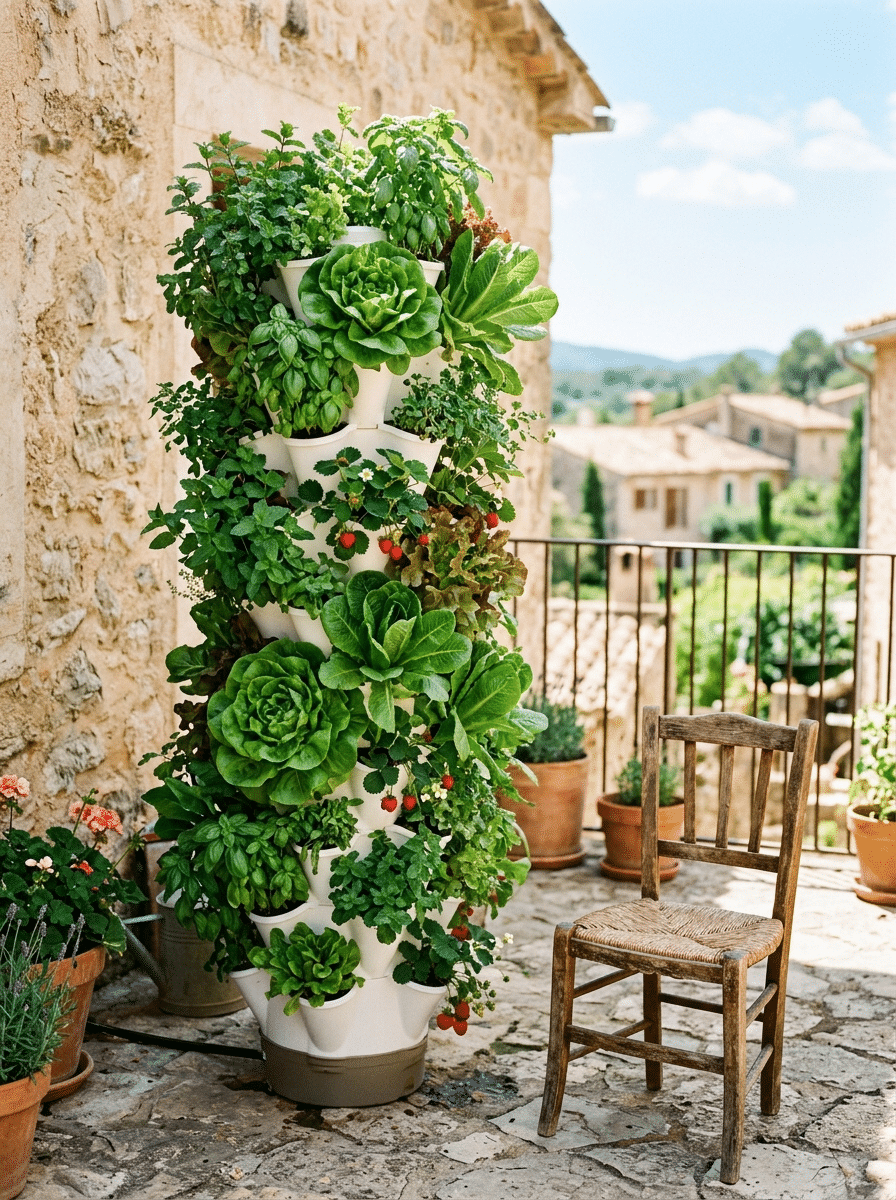
A vertical gardening tower lets you grow dozens of plants in the floor space of a small chair. Instead of spreading plants across the ground, you stack them upward in a column, so a balcony, patio, or sunny corner can feel like a mini farm. For anyone short on space, that’s a big deal.
But towers come with questions. Do you need soil? How much does one cost? Which plants grow well, and which ones fail? And is a hydroponic tower really worth the money compared to a simple planter or trellis? Many guides skip these answers or only talk about one brand.
This guide covers the full picture. You’ll learn how a tower works, the main types of vertical gardening systems, and what to grow. We’ll walk through setup indoors and outside, weekly care, costs, common mistakes, and how to choose the right tower for your home. If you want fresh greens, herbs, and vegetables without a big yard, you’re in the right place.
What Is a Vertical Gardening Tower?
.
A vertical gardening tower is a tall, column shaped planter that grows plants on all sides, stacked from bottom to top. Some towers use soil, while others are hydroponic systems that circulate nutrient rich water around the roots with a small pump. Both save space and make harvesting easier, while outdoor pallet projects backyard enthusiasts also try repurposing wooden pallets into vertical planters for herbs, leafy greens, and colorful flowers.
A few quick facts:
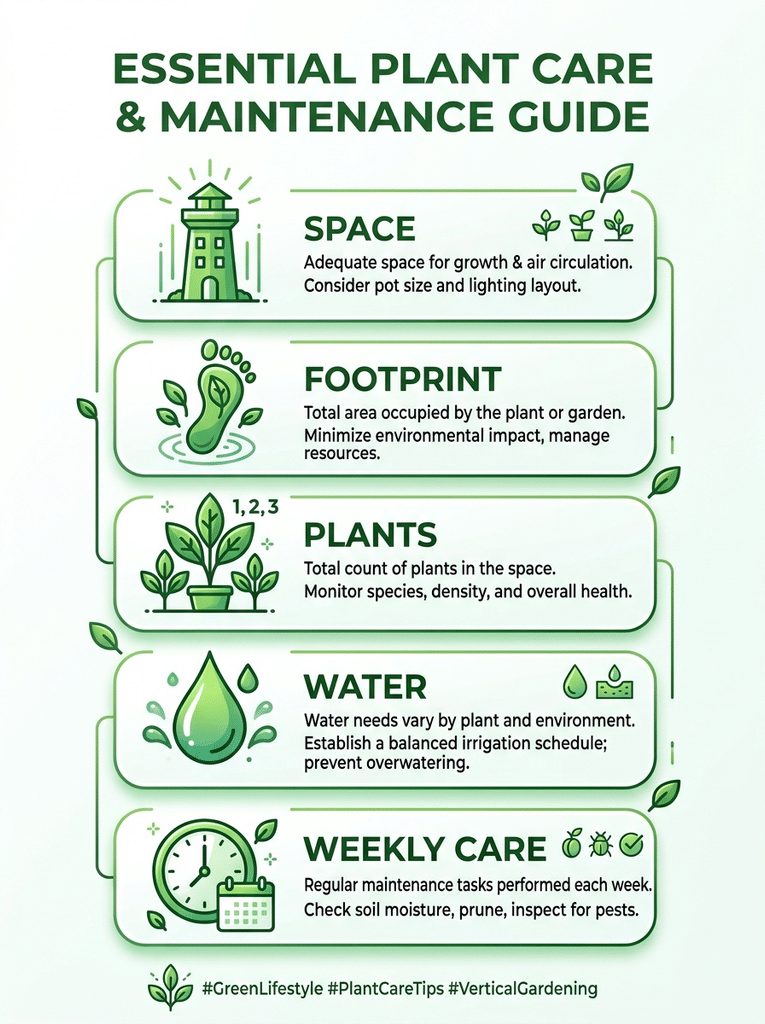
- Footprint: A single tower often takes up only a few square feet of floor space.
- Plants: Many home towers hold from a dozen to about three dozen plants.
- Water use: Recirculating hydroponic towers are commonly reported to use far less water than soil gardens, often up to 90 percent less.
- Best crops: Leafy greens, herbs, strawberries, and cherry tomatoes are the easiest to start with.
- Upkeep: Many hydroponic towers need only a few minutes of weekly care.
1. How a Vertical Garden Tower Works
The idea is simple: give plants what they need, in less space, by using height. How that happens depends on the type of tower.
The Basics of a Hydroponic Gardening Tower
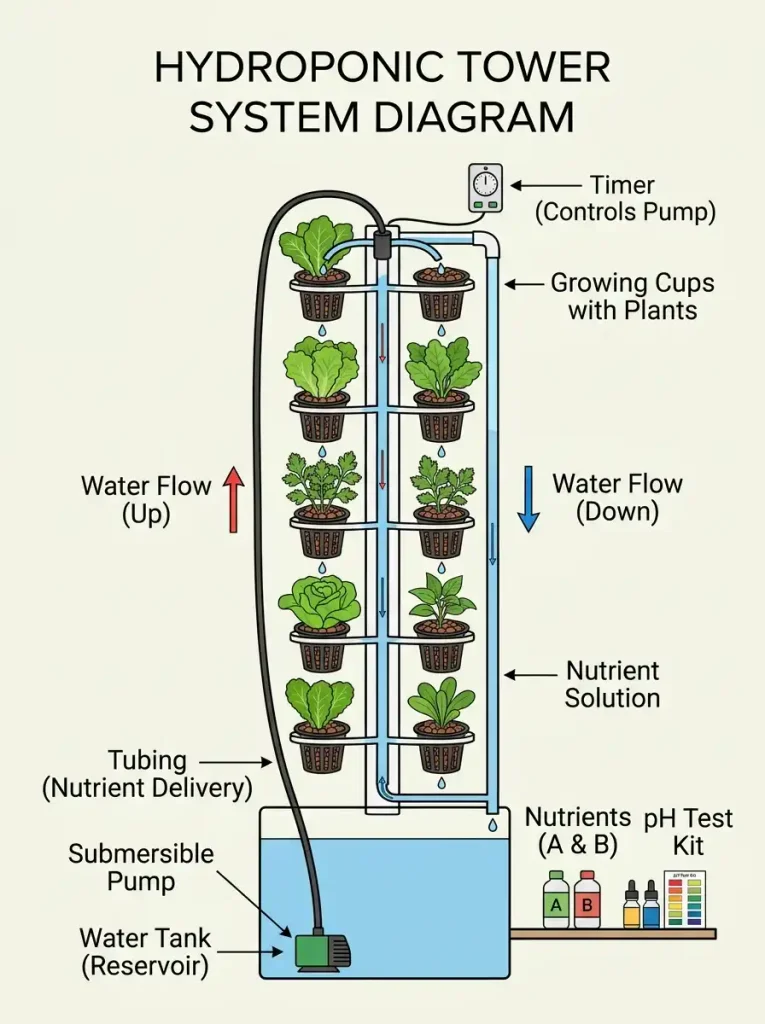
A hydroponic gardening tower grows plants without soil. A tank at the bottom holds water mixed with plant nutrients. A small pump lifts that water to the top, and it trickles down past the roots before returning to the tank. Plants sit in small cups filled with a light growing medium such as coco coir or rockwool, which holds the roots in place.
Most systems run on a timer, so the pump turns on and off in cycles. That gives roots both water and air, which plants need to grow fast. The whole setup is a closed loop, so very little water is wasted. You only top off the tank as plants drink.
Hydroponic Versus Aeroponic Towers
You’ll also see the word aeroponic. In an aeroponic tower, roots hang in the air inside the column and are misted with nutrient water instead of sitting in a flowing stream. Both are soilless, and both are often grouped as vertical hydroponic gardening. For a home gardener, the day to day care is very similar.
What You Need to Keep Going
A typical hydroponic tower needs:
- A water tank (the reservoir)
- A pump and timer to circulate the water
- Nutrient solution, usually sold in two parts that you add one at a time
- A pH test kit, because plants take up nutrients best within a narrow pH range, often around 5.5 to 6.5
- Light, either from the sun or a grow light
- Power, a small amount, to run the pump and timer
Many towers come as kits with all of this included, which is a big help if you’ve never grown anything before.
2. Why Choose a Vertical Gardening Tower? Key Benefits
People love towers for a handful of reasons. Here are the ones that matter most in real life.
Space Saving Gardening
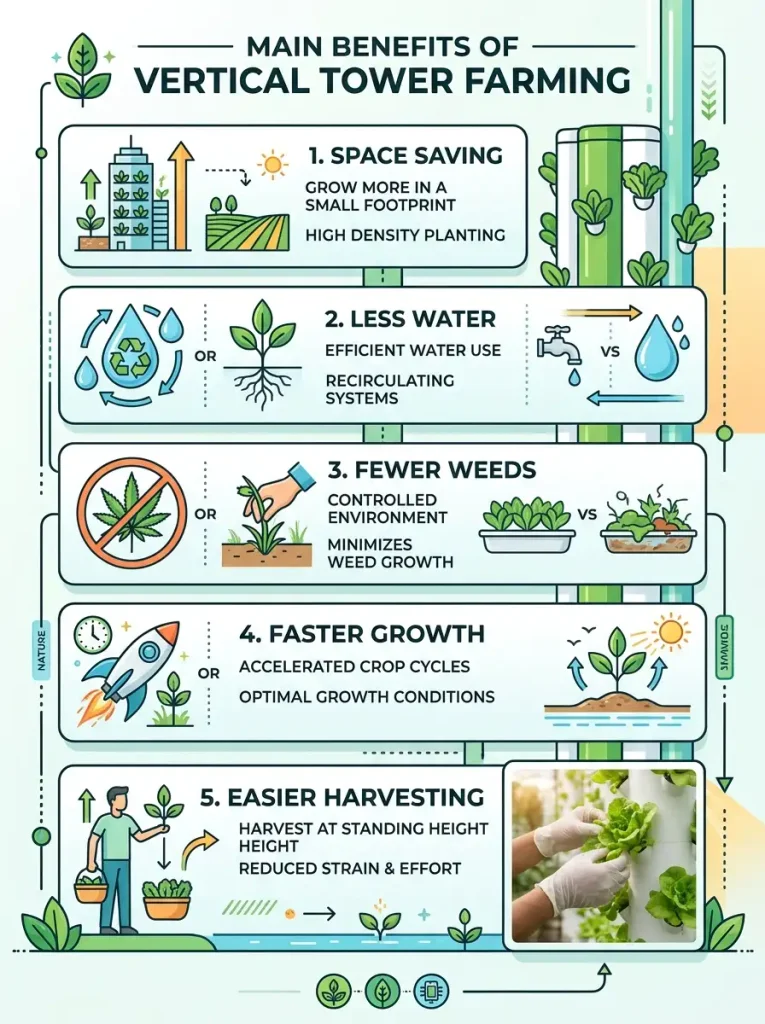
Space saving gardening is the headline benefit. Some home towers pack up to 36 plants into about 4 square feet of floor space. That’s a harvest that would otherwise need a large garden bed. Apartment dwellers can grow salad greens on a balcony, and suburban families can add a mini farm beside the back door.
Less Water and Fewer Weeds
Because the water recirculates, towers waste little of it. Some makers claim up to 95 percent less water than traditional gardening, while many sources cite about 90 percent. The exact number depends on your setup and climate, but the savings are real, which is a good fit for dry regions and water bills. With no soil, you also skip most weeds and many soil borne pests.
Faster Growth and Longer Seasons
In a well managed system, plants get steady food and water, so many grow faster than they would in soil. Towers also allow nearly year round growing when you move them indoors or use grow lights, since they don’t rely on the weather outside. Plants in the same tower often grow evenly because every plant receives the same amount of water and nutrients.
Easier on Your Back
Tower plants sit at standing height, so you don’t have to bend or kneel. Harvesting is simple because you can see every plant at a glance. That helps you pick at the right time, which keeps plants producing longer.
Better Airflow and Cleaner Growing
When plants grow upward, leaves and fruit get more air and light. Better airflow helps reduce some common problems, like mildew on crowded plants. A tower is also tidy, with no muddy beds and no soil to track indoors.
3. Types of Vertical Gardening Systems
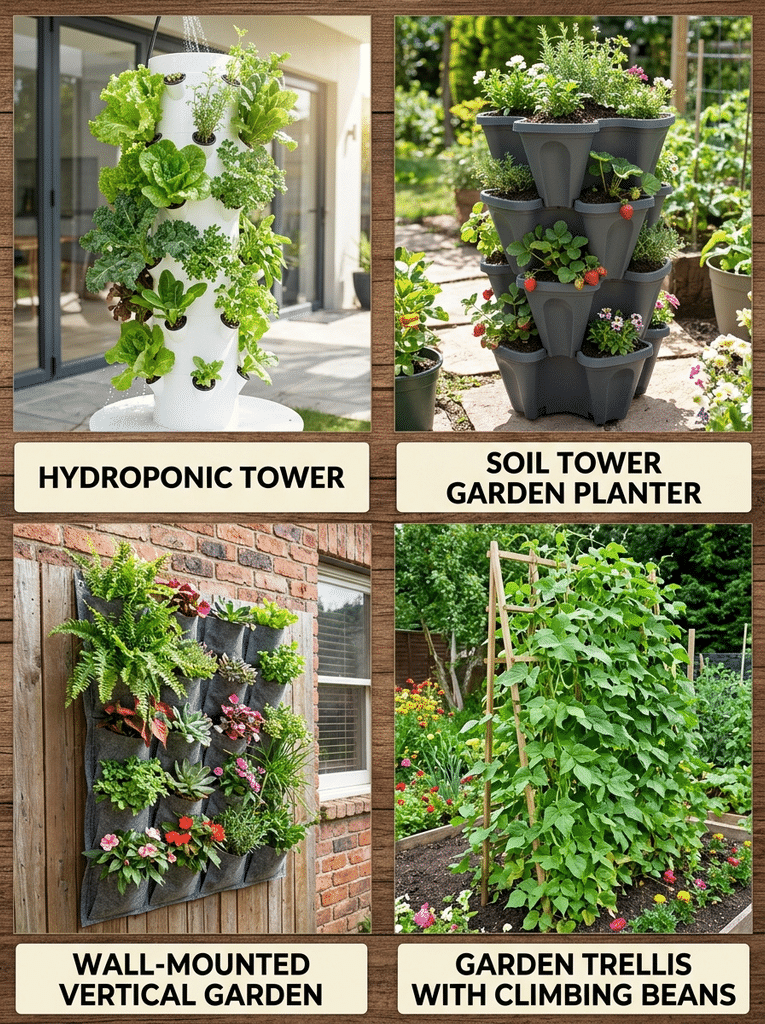
Not every vertical garden is a hydroponic tower. The best choice depends on your space, budget, and how much tech you want. Here are the main vertical gardening systems.
Hydroponic and Aeroponic Towers
These are the high output option. They suit leafy greens, herbs, strawberries, and many fruiting plants. They cost more upfront and need power, but they give you the most food in the least space, along with automated watering.
Soil Based Tower Garden Planter
A tower garden planter filled with soil is simpler and cheaper. Many are stacked pots, tiered boxes, or tall barrel style planters with openings along the sides. You water from the top, and the water works its way down. They’re a good starter option and work well for herbs, lettuce, and strawberries. Make sure the planter has drainage so roots don’t sit in standing water.
Vertical Garden Planter and Wall Pockets
A vertical garden planter hangs on a fence or wall. Fabric pocket planters, rail planters, and wall mounted boxes all fit this group. They’re lightweight and budget friendly, though pockets tend to dry out fast, so they need more frequent watering.
Trellises, Arches, and Obelisks
Outdoor vertical gardening systems often use trellises to grow climbing plants upward. This is classic vertical vegetable gardening, and it works well in raised beds and large garden plots. The three common types are:
- Arch trellises, which connect two raised beds and create a walkway of produce
- Obelisk trellises, which resemble a teepee and fit in the center of a bed
- Panel trellises, which sit along a fence or run down the middle of a bed to give you two growing sides
A few trellis tips from experienced gardeners: choose a trellis at least six feet tall, anchor it well (pushing it about 12 inches into the soil), and plant on the outside edge so you can prune and harvest easily. Running the trellis north to south helps all sides get light.
Which System Is Best for You?
- Tight on space and want the biggest harvest? Choose a hydroponic tower.
- On a small budget? Try a soil tower garden planter or a wall pocket planter.
- Have a garden bed? Use trellises for beans, cucumbers, and tomatoes.
- Want a mix? Pair a tower for greens with a trellis for climbing vegetables.
4. What to Grow in a Vertical Gardening Tower
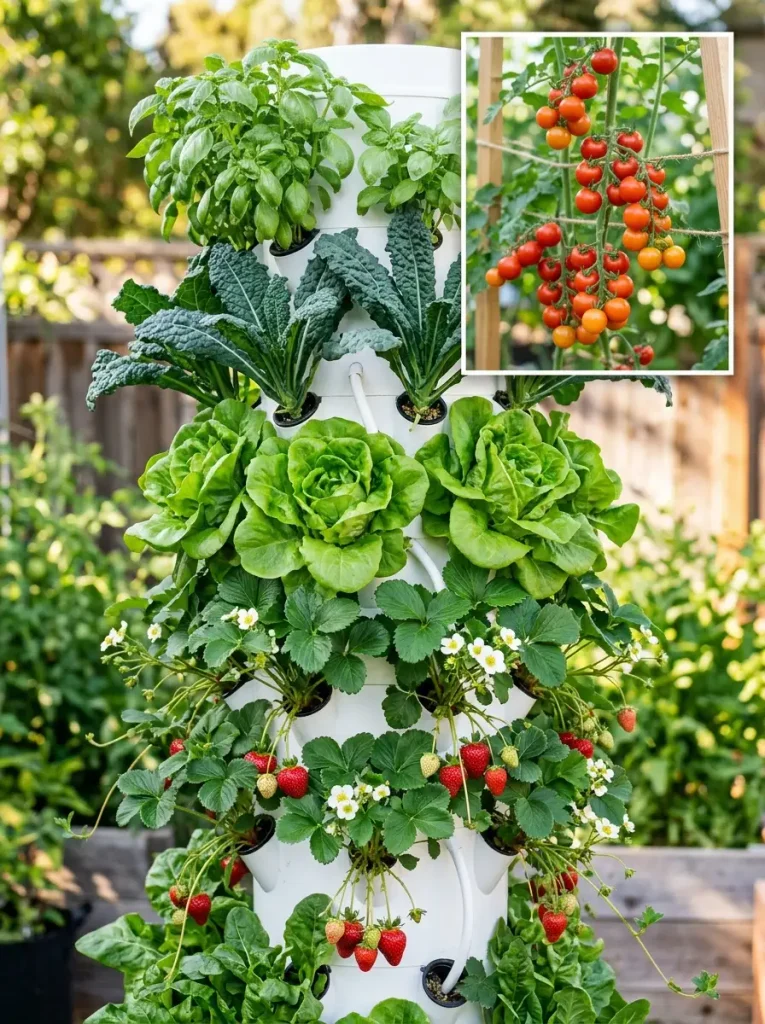
Plant choice makes or breaks a tower. The best crops are compact, fast, and happy with shallow roots.
Easy Starter Plants
- Lettuce and salad greens: The fastest and simplest to grow. Great for first timers.
- Basil, mint, and other herbs: They thrive in hydroponic systems and smell wonderful.
- Spinach, kale, and chard: Leafy greens that regrow after harvest.
- Strawberries: A little trickier at first, but they keep producing once established.
- Bok choy and water spinach: Fast, tender greens that handle a tower well.
If you’re new to hydroponics, start with lettuce and herbs. They teach you how nutrients and pH work before you try fruiting plants.
Plants That Take a Little More Skill
- Cherry tomatoes: They take longer and need support, but the homegrown taste is worth it.
- Cucumbers and zucchini: They grow well but need a cage or trellis so the vines don’t take over.
- Peppers and green beans: Possible with enough light and a stable setup.
- Broccoli and cabbage: Some growers raise these in aeroponic towers, which helps with a crop that can be tricky in soil. They need more space per plant, so you’ll fit fewer in each tower.
Plants to Skip
Large root crops like potatoes, carrots, and turnips don’t suit most towers, and big sprawling plants like pumpkins or full size squash need far more room than a tower offers. As one university extension source notes, larger crops are harder to grow in these systems, and traditional farming still makes more sense for big staple crops.
Tips for Plant Placement
- Put taller plants, like tomatoes or cucumbers, at the back or top so they don’t shade smaller plants.
- Place leafy greens and herbs in the middle and lower levels.
- Stagger planting dates so you harvest steadily instead of all at once.
- Use the plants’ needs as a guide, and keep plants with similar light and nutrient needs together.
5. How to Set Up a Vertical Garden Tower Step by Step
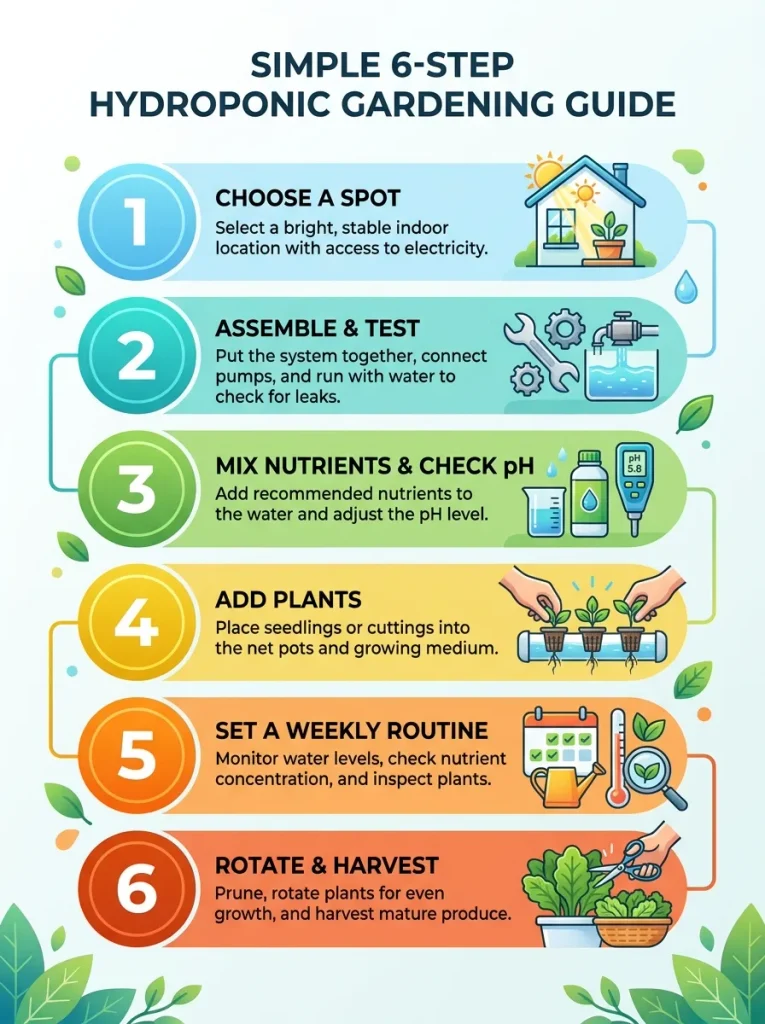
Setting up a tower takes about an hour for most people. Here’s a clear path from box to first harvest.
Step 1: Choose the Right Spot
Look for a place with plenty of light. Most leafy greens and herbs want at least six hours of direct sun, and fruiting plants need more. Indoors, a south facing window works well. If the light is weak, add a grow light on an adjustable stand. Make sure the spot is level, sturdy, and close to an outlet.
Step 2: Assemble and Test
Follow the instructions to stack the tiers, connect the pump, and set the timer. Fill the tank with water and run the pump for a few minutes to check for leaks and uneven flow. It’s much easier to fix problems before the plants go in.
Step 3: Mix Your Nutrients and Check pH
Add nutrient parts in the order the label says, stirring after each. Then test the pH. If it’s too high, use a pH down solution. If it’s too low, use pH up. A pH around 5.5 to 6.5 is the usual target for most leafy crops.
Step 4: Add Your Plants
You can start from seed or buy seedlings. Seedlings that are about three to four weeks old are ready to move straight into a tower. If you start seeds, use small starter plugs, keep them warm and well lit, and move them when they have real roots. Place each seedling into its cup so the roots can reach the water flow.
Step 5: Set a Weekly Routine
Most towers need only a few minutes a week. A typical check includes:
- Add nutrient part A and stir
- Add nutrient part B and stir
- Top off the water
- Check the pH and adjust
- Look over the plants for pests or yellow leaves
Many growers also replace the tank water completely every two to three weeks, but follow the schedule from your tower’s maker.
Step 6: Rotate and Harvest
If your tower is by a window, turn it a quarter turn once a week so all sides get equal light. A plant dolly makes this easy. Harvest leafy greens by cutting outer leaves first so the plant keeps growing. Pick fruit as soon as it’s ready.
Indoor Versus Outdoor Towers
Outdoor vertical gardening systems have a few extra concerns. Wind can tip a tall tower, so place it in a sheltered spot or anchor it. Hot sun can warm the water in the tank, which can slow growth and invite algae, so shade the tank or move the tower to afternoon shade in summer. Cold weather can stop growth, and freezing temperatures can damage pumps and pipes. If your climate gets cold, bring the tower inside or into a greenhouse for winter.
Indoors, the main issues are light and noise. Choose a quiet pump if the tower will sit in a living space. Also check the tank size, since a bigger tank means less frequent refills.
6. Costs, Maintenance, and Common Mistakes
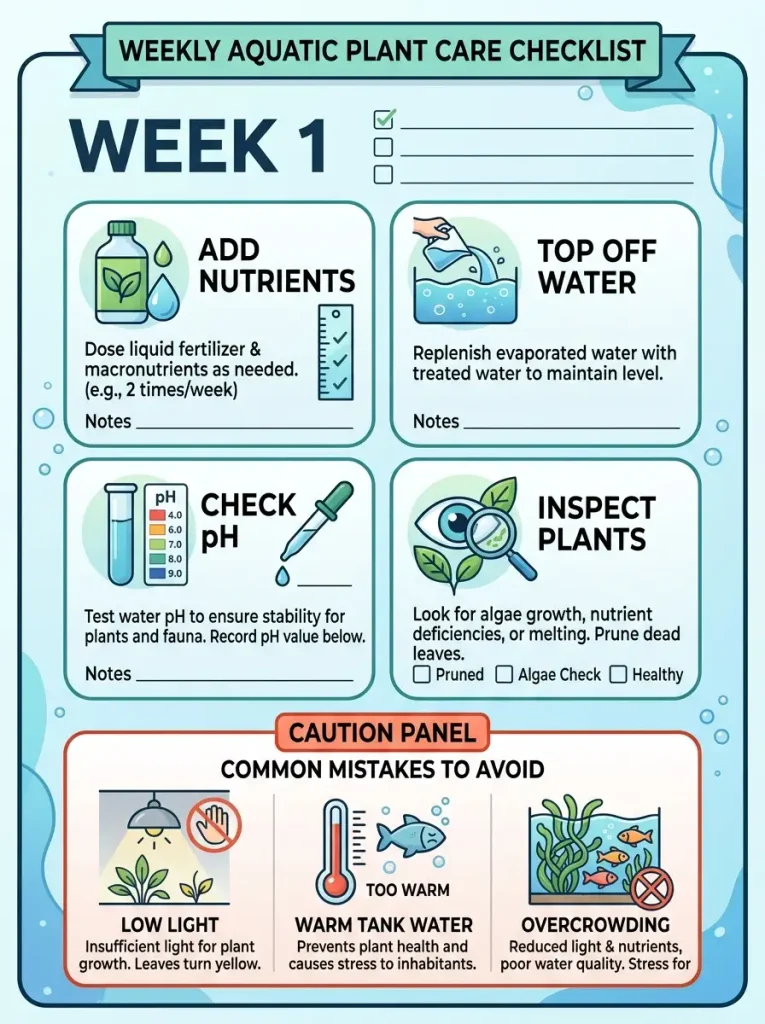
How Much Does a Tower Cost?
Prices vary widely. A basic soil tower garden planter can cost very little, while a full hydroponic tower kit is a bigger investment. One popular home hydroponic system sells for roughly $350 to $650 depending on size and number of tiers. If you’re on a budget, start with a smaller tower and add tiers later. Remember to count the ongoing costs too: nutrients, seedlings or seeds, and a small amount of electricity.
Is It Worth It?
For many people, yes. A tower can pay for itself over a year or two if you eat a lot of fresh greens and herbs, since store bought salad and herbs add up. But a tower is not a perfect fit for everyone. There’s a high upfront cost, it needs power, and large crops are harder to grow. If you only want a few herbs, a simple pot planter may be enough.
Common Mistakes to Avoid
- Too little light. Weak light leads to leggy, pale plants. Add a grow light if needed.
- Ignoring pH. Even with good nutrients, plants struggle when pH drifts too far.
- Overcrowding. Squeezing in too many big plants blocks light and airflow.
- Warm tank water. Hot water holds less oxygen and encourages algae. Keep the tank cool and shaded.
- Letting the pump clog. Check the pump and tubing during weekly care, and clean them between crops.
- Starting with hard crops. Begin with lettuce and herbs before trying tomatoes.
- Forgetting a backup plan. If the power goes out for a long time, plants can dry out. Keep an eye on your system during storms or trips.
Going on Vacation
Many growers leave their towers for up to two weeks without trouble, as long as the tank is full and the timer is working. For longer trips, ask a friend to check the water level.
7. How to Choose the Best Tower for Your Home
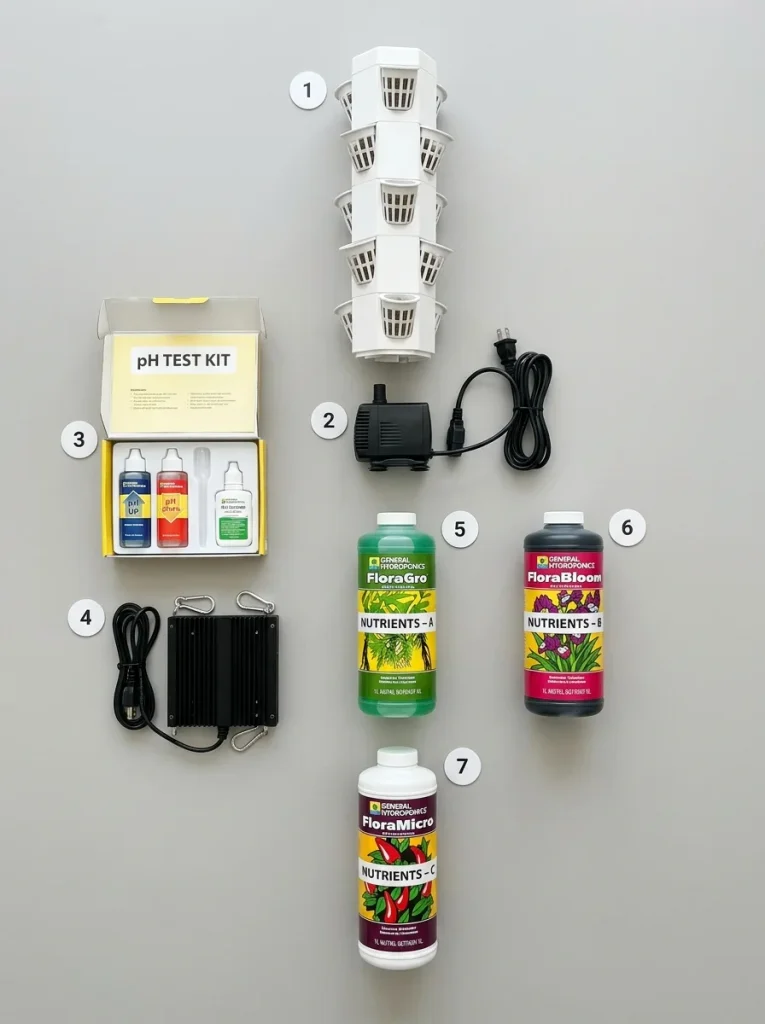
Use this checklist when comparing a vertical garden tower or a hydroponic tower garden.
- Capacity: How many plants fit, and how much floor space does it take?
- Tank size: Bigger tanks need fewer refills and stay more stable.
- Pump quality: Look for a quiet, reliable pump with a timer included.
- Materials: Choose food safe, UV resistant plastic or metal if the tower will sit outside.
- Indoor or outdoor use: Make sure the tower is rated for where you’ll put it.
- Lighting: Check whether it works with grow lights, or whether lights are included.
- Expandability: Can you add more tiers later?
- Kit contents: Nutrients, pH test kit, and starter plants save time and money.
- Support and warranty: Good instructions and customer help matter for beginners.
A smart way to start is with a smaller tower, learn the routine, and expand when you’re confident.
Frequently Asked Questions
How does a vertical gardening tower work?
A vertical gardening tower grows plants in a stacked column. In a hydroponic tower, a pump moves nutrient rich water from a tank to the top, and it flows past the roots before returning to the tank. In a soil tower, you fill the planter with soil and water from the top.
What grows best in a vertical garden tower?
Lettuce, spinach, kale, basil, mint, and strawberries grow best. Cherry tomatoes and cucumbers can work too, but they need more light and support.
Can I use a hydroponic tower garden outdoors?
Yes, as long as it is stable, sheltered from strong wind, and protected from extreme heat and frost. Shade the water tank in summer and bring the tower in when freezing weather arrives.
How much sunlight does a tower need?
Most leafy greens and herbs need at least six hours of direct light a day. Fruiting plants need more. If your spot is dim, use a grow light.
Is vertical vegetable gardening better than traditional gardening?
It depends on your goals. Vertical systems save space and water and make harvesting easier, but they cost more upfront and suit smaller crops. Traditional beds are better for large crops like potatoes and pumpkins.
Conclusion
A vertical gardening tower is one of the smartest ways to grow fresh food when space is tight. It saves water, reduces bending and weeding, and gives you a steady supply of greens and herbs close to your kitchen. Whether you choose a hydroponic tower, a simple tower garden planter, or a trellis for climbing vegetables, the key to successful gardening is matching the system to your available space and skill level.
You don’t need to do it all at once. Choose a spot with good light, start with lettuce and basil, and set a weekly five minute routine. Once you see your first harvest, you can add more tiers or try new plants.