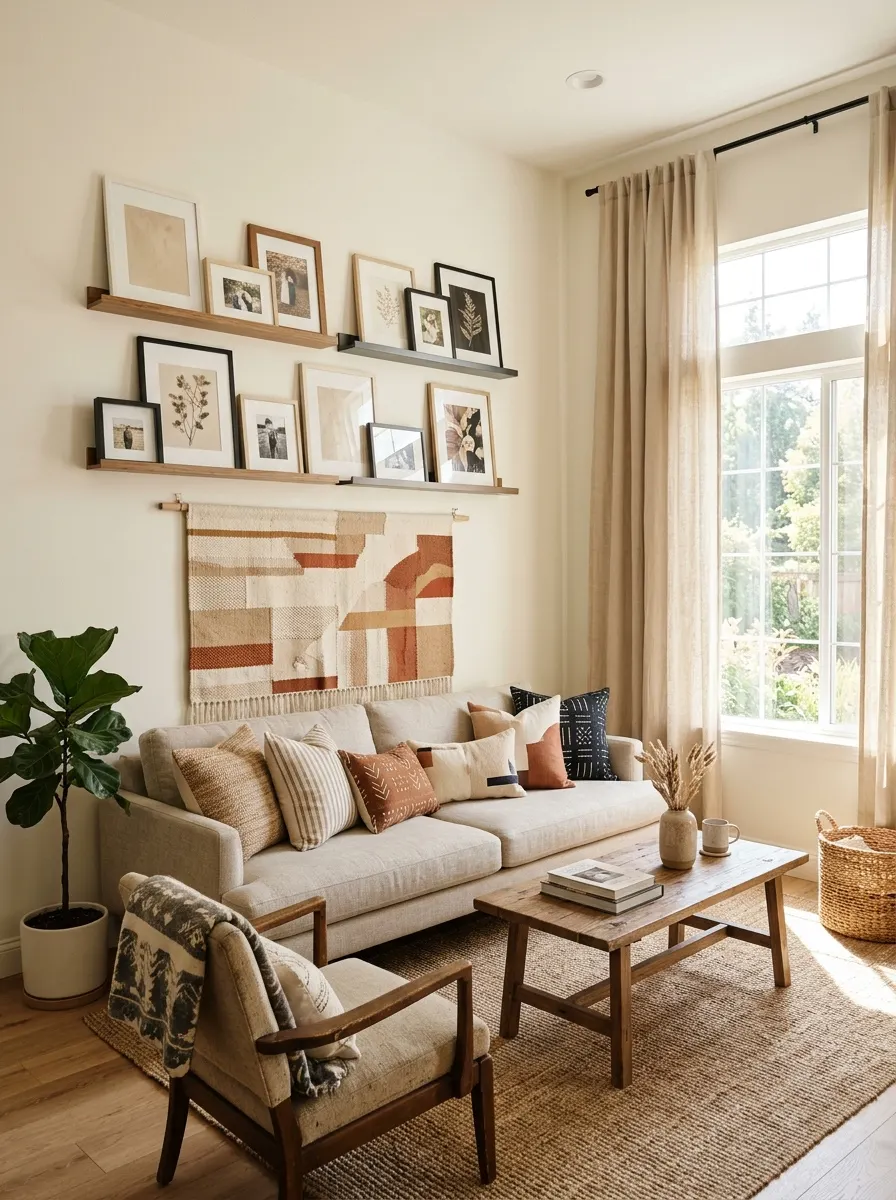
Your living room does a lot of work. It is where you relax, host friends, watch movies, and sometimes even eat dinner. So when it feels flat or dated, you notice it every day. The good news is that you do not need a big budget or a designer to fix it. With the right DIY home decor ideas for your living room, you can change how the whole space looks and feels in a few weekends.
This guide pulls together the most useful projects, from paint and trim to gallery walls, fabric art, pillow covers, furniture makeovers, and small space tricks. You will also learn how designers make a room look more expensive without spending more. Every idea is written in plain steps, so you can pick one and begin today.
What Are the Best DIY Living Room Decor Ideas?
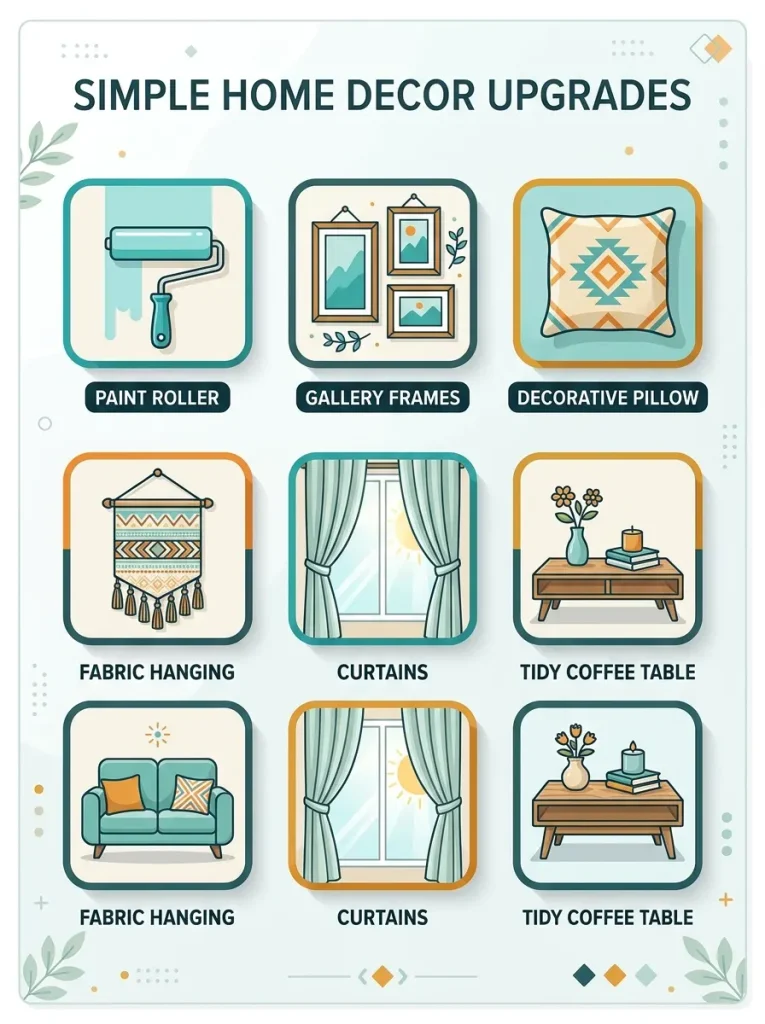
The best DIY living room decor ideas are the ones that make a big difference for a little money. Start with a fresh coat of paint, then add a gallery wall, handmade pillow covers, and a fabric wall hanging. Hang curtains higher, paint a tired piece of furniture, and finish by removing clutter. When you choose living room furniture, look for affordable pieces that match your style and complement your existing decor. Together, these simple projects can cost less than buying a new sofa cushion set from a store.
Plan Your Living Room Makeover Before You Buy Anything
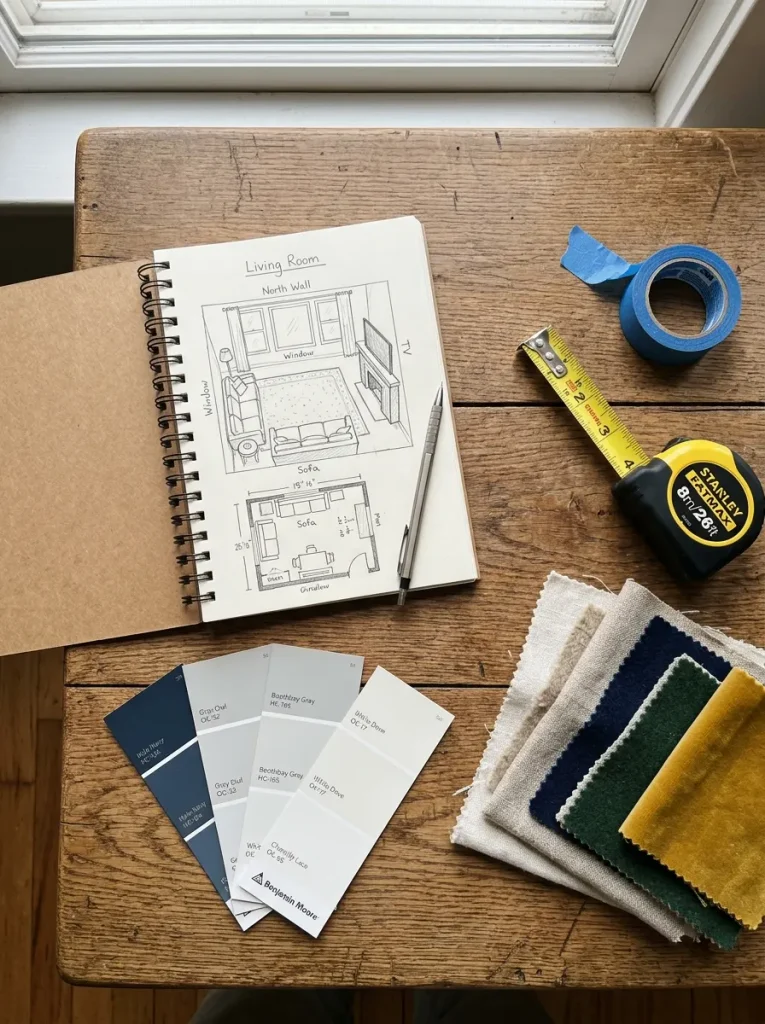
A little planning saves money and prevents the “I bought it but it does not fit” problem. Spend one evening on the steps below before you open your wallet.
Decide How You Want the Room to Feel
Before choosing colors or projects, name the mood you want. Cozy? Bright? Calm? Bold? Pick two or three words and keep them in mind each time you shop or craft. One designer quoted by a popular DIY blogger makes the point well: your home should tell your story, so collect things you connect with instead of chasing trends. If an item does not fit your mood words, skip it, even when it is on sale.
Take Stock of What You Already Own
Walk around your home and gather pieces you could reuse. A side table from the bedroom, a lamp from a guest room, or a dresser from the hallway might work better in the living room than anything new. Swapping items between rooms costs nothing and gives you a fresh look right away. If a piece is not working anywhere, you can sell it online and put the money toward something you love.
Pick a Simple Color Plan
A simple palette makes a room feel pulled together. A helpful trick from HGTV design pros is to choose your three favorite shades and build everything from them. If your budget is small, keep big items like the sofa and rugs neutral, then bring color in through flowers, plants, and pillows. Those small items are cheap to change when your taste changes.
Set a Budget Tier
It helps to sort your projects by cost so you can do the cheap ones first.
- Free projects: rearranging furniture, decluttering, swapping decor between rooms, deep cleaning rugs and upholstery.
- Low cost projects (under about $50): spray paint updates, pillow covers, printable art, a fabric wall hanging, thrift store frames.
- Medium projects (about $50 to $250): painting the room, picture frame molding, a ceiling medallion, a painted furniture makeover, new curtains and rods.
Prices vary by store and region, so treat these as starting points and check your local costs.
Gather a Basic Tool Kit
Most projects in this guide need only a few tools: a tape measure, a level, painter’s tape, a hammer, a drill, a small saw or miter box, sandpaper, a paintbrush and roller, and a good pair of fabric scissors. Buy what you need as each project comes up instead of buying everything at once.
Refresh Your Walls With Paint, Trim, and Texture
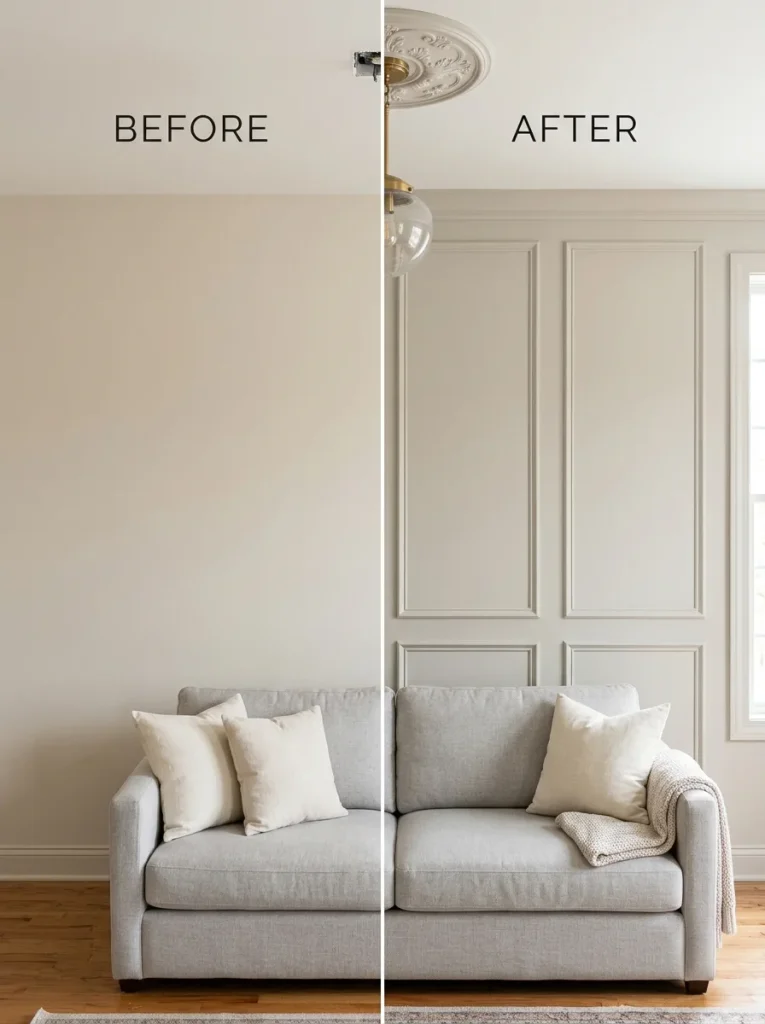
Walls take up the most visual space in a living room, so changing them gives you the biggest return.
Start With a Fresh Coat of Paint
Paint is the cheapest way to change an entire room. If your walls are dark or dingy, a lighter shade can make the room feel larger. Many DIY writers suggest a soft neutral that sits between gray and beige, often called greige, because it works with almost any color scheme. A true bright white can make decor look washed out in some rooms, so test a few sample patches first and look at them in morning and evening light.
On a tight budget, ask whether you have leftover paint from another room, or check a local salvage or restore shop, where partly used gallons often sell for much less.
Try an Accent Wall
An accent wall adds color without the work of painting the whole room. Designers often paint one wall a brighter shade and leave the others neutral, which creates a clear color scheme while keeping the room balanced. If you do not want paint, try paintable beadboard wallpaper or faux brick panels. These products give you texture and depth at a lower cost than real brick or wood paneling.
Add Picture Frame Molding for a Classic Look
Plain walls become far more interesting with picture frame molding. You create rectangles on the wall using thin trim, paint everything one color, and the result looks like a custom detail from an older home. One design writer used it to make a small city apartment feel much more refined, and another blogger spent roughly $200 on chair rail and picture molding and said the room felt completely new. If you rent, ask your landlord first, or use lightweight trim that attaches with removable adhesive.
How to do it:
- Measure your wall and sketch the rectangles on paper first.
- Mark the layout on the wall with painter’s tape so you can see it before you commit.
- Cut the trim to size with a miter box and saw.
- Attach the pieces with construction adhesive and small finishing nails.
- Fill the nail holes, caulk the seams, and paint the wall and trim the same color.
Give the Ceiling Some Attention
The ceiling is often called the fifth wall. A simple ceiling medallion around a light fixture costs less than you might think, and one design writer paid about $38 for hers. If you want a bigger statement, HGTV designers suggest painting the ceiling a color other than white or covering it with a graphic wallpaper. Both ideas draw the eye upward and add personality.
Add Depth to Bookcases
Here is a quick designer trick: paint or wallpaper the back panel of a bookcase. A deeper shade behind your books and objects creates contrast, so your collection stands out. It is a small project that takes an hour and looks custom.
Update Your Fireplace
If you have a dated brick fireplace, a whitewash technique can brighten it while keeping its natural character. Some designers have also found low cost ways to cover old fireplace tile instead of tearing it out. Either way, a refreshed fireplace becomes a natural focal point for the room.
DIY Gallery Wall Ideas That Fill Empty Space
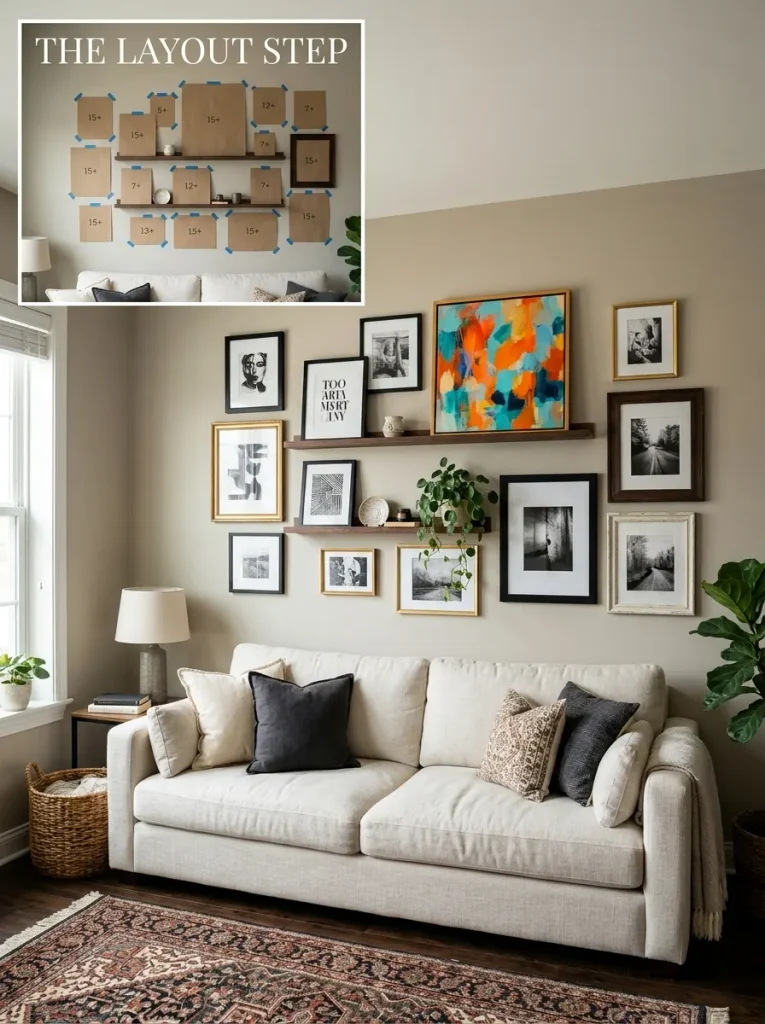
A large blank wall can make a living room feel unfinished. One huge piece of art can cost a lot, but a collection of small, inexpensive pieces gives the same impact for far less. These DIY gallery wall ideas work for any style.
Build a Ledge Gallery Wall
Picture ledges are narrow shelves that hold frames without any hanging hardware on the art itself. Blogger Ashley Wilson built one behind her sofa using shelves that cost around $10 each at IKEA, then filled them with framed cards, inexpensive printables, and personal touches. Ledges are great for renters and for people who like to change the display often, since you can swap art in seconds. Prices change, so check current costs before you shop.
Use Free Printables and Thrift Store Frames
You can make real wall art with almost no money. Download free botanical, abstract, or vintage printables, print them on heavy paper, and slide them into thrift store frames. Spray paint mismatched frames in one color so the whole group looks planned. Flea markets are also good places to find original sketches that cost only a few dollars, and a simple frame turns them into something that looks collected, not bought.
Plan the Layout on the Floor First
A messy gallery wall usually comes from skipping the plan. Follow these steps for a clean result:
- Trace each frame on kraft paper and cut out the shapes.
- Tape the paper shapes to the wall with painter’s tape.
- Move them around until the spacing feels even, usually about 2 to 3 inches between frames.
- Mark the nail spot on each paper shape, then remove the paper and hammer in the nails.
- Hang the largest piece first, then build outward.
If you do not want to hammer many holes, hang pictures in rows or use damage free hanging strips.
Let the Gallery Climb
In a room where every inch counts, do not stop your art at eye level. HGTV designers suggest letting a gallery wall rise all the way toward the ceiling, which draws the eye up and makes the room feel taller. Mix sizes, and include a mirror or a woven basket to break up the frames.
Go Big With One Bold Piece
Small rooms can handle big art. A large abstract canvas can fill the whole wall with color and life. You can paint your own with a large canvas, painter’s tape, and three or four craft paint colors. Tape off simple shapes, paint inside them, peel the tape, and you have a modern piece for the price of the supplies.
DIY Fabric Wall Hanging, Pillow Covers, and Curtain Upgrades
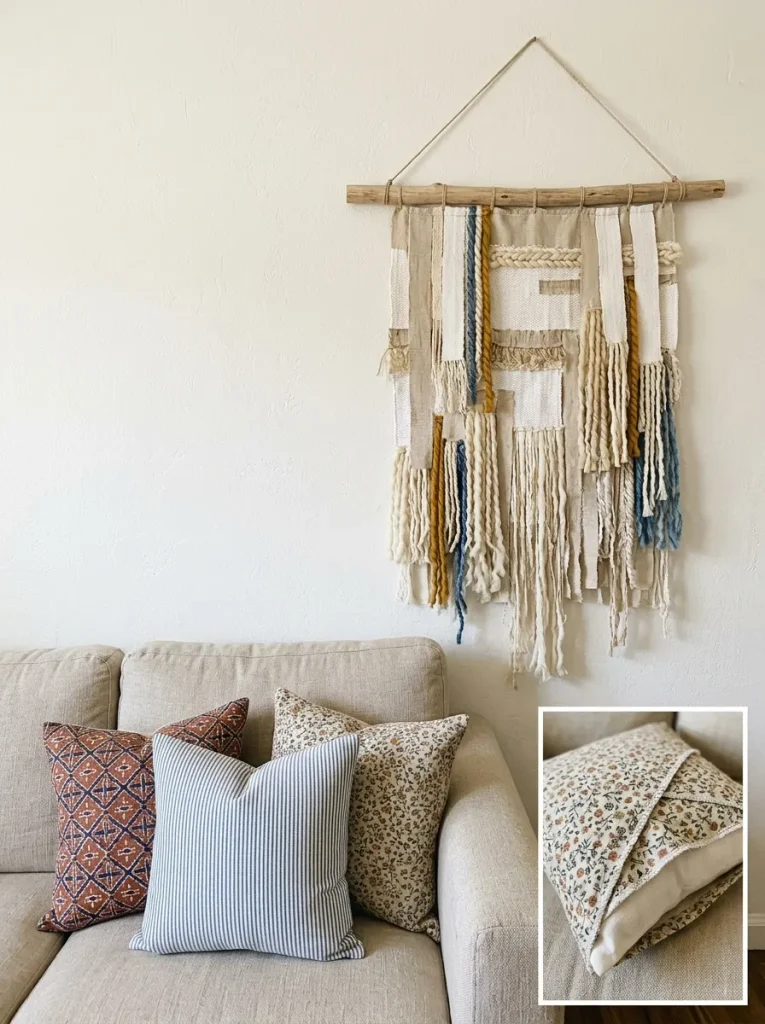
Textiles make a living room feel warm and finished. They are also some of the easiest things to make at home, even if you have never sewn before.
Make a DIY Fabric Wall Hanging
A DIY fabric wall hanging adds softness and texture, and it can also absorb sound in a room with hard floors. You can make one with fabric scraps and a wooden dowel in an afternoon.
What you need: a wooden dowel about 24 inches long, 4 to 6 strips of fabric or yarn in different textures, scissors, fabric glue or a needle and thread, and twine.
How to make it:
- Cut fabric strips to different lengths, from about 12 to 30 inches.
- Fold each strip over the dowel and glue or stitch it in place, working from the center outward.
- Mix colors and textures, such as linen, cotton, and chunky yarn, so the piece has depth.
- Trim the bottom edge in a straight line, a curve, or a V shape.
- Tie twine to each end of the dowel and hang it on a nail.
Another option is fabric scrap art. Stretch a scrap of patterned fabric over a canvas frame, staple it at the back, and add a few lines of acrylic paint for a custom look.
Sew or No Sew DIY Throw Pillow Covers
Pillows are one of the best ways to add color for little money. A smart trick is to buy plain pillow inserts and make your own covers, which lets you change the look each season without replacing the filling. DIY throw pillow covers are also a great way to use leftover fabric, an old curtain, or a thrifted tablecloth.
Envelope cover method (no zipper needed):
- Measure your pillow insert. Cut one piece of fabric about 1 inch smaller than the pillow in both directions, so the cover fits snugly.
- Cut two back pieces, each about two thirds the width of the front, so they overlap in the middle.
- Hem one long edge of each back piece by folding it twice and stitching.
- Lay the front piece face up, place the back pieces face down on top with the hemmed edges overlapping, and pin the edges.
- Sew around all four sides, turn the cover right side out, and insert the pillow.
If you do not have a sewing machine, use iron on hem tape or fabric glue. For a quick upgrade, add fringe, pom poms, or a contrasting button. Mix patterns and solids, and combine different sizes so the pile looks relaxed.
Refresh a Tired Sofa
Before you replace a sofa, see whether new cushions or covers can fix the problem. Washing removable covers, replacing flat cushion inserts, or reupholstering a worn chair can bring an old piece back to life. HGTV designers point out that reupholstering several mismatched pieces in the same fabric family can give a room a new, cohesive look.
Make Your Own Curtain Rods
Curtain rods can cost more than you expect, but you can make a sturdy one from electrical conduit pipe for a few dollars per window. Cut the pipe to length at the hardware store, paint it with metallic spray paint, and add inexpensive finials. The result looks like a custom rod at a fraction of the price.
Hang Curtains Higher and Wider
This is a free trick that works every time. Mount the rod close to the ceiling, or a few inches above the window frame, and extend it past the window on both sides. Your windows look taller and wider, and more natural light enters the room. Keep window treatments light. HGTV designers warn that dark, heavy curtains can weigh down a small living room, and some rooms look best with bare or nearly bare windows.
Furniture Makeovers and Smart Storage Projects
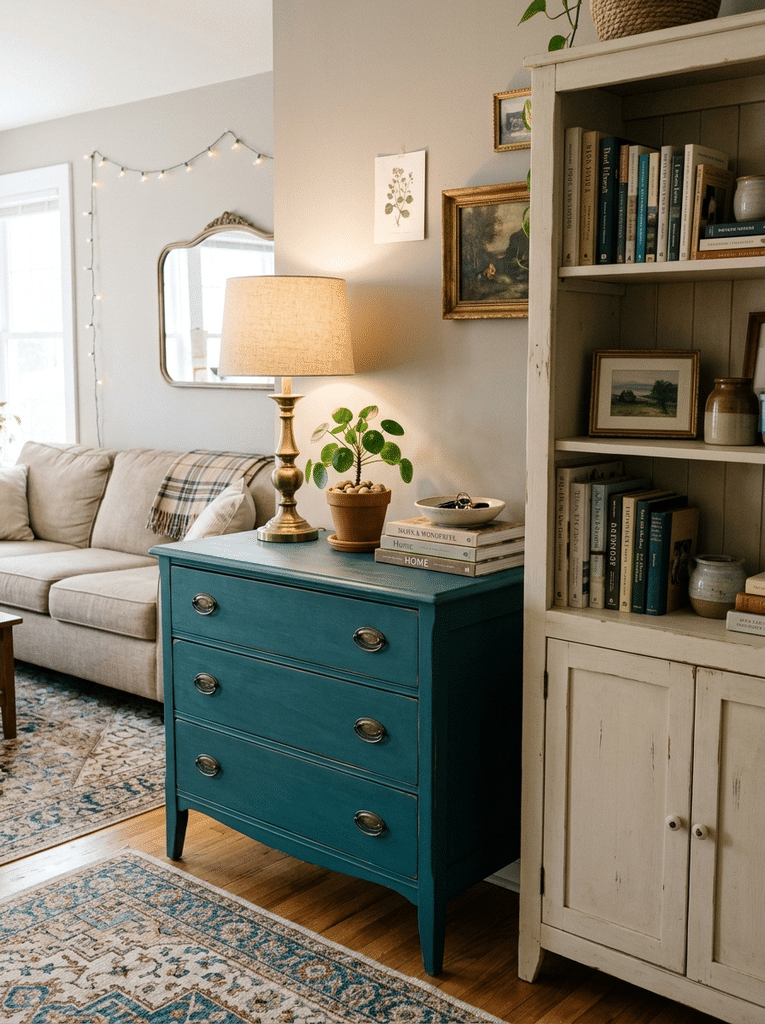
Furniture is usually the biggest expense in a living room, so refinishing what you own is where DIY saves the most.
Paint or Stain Old Furniture
A thrift store coffee table or a family dresser can look brand new with paint. Here is a simple process:
- Clean the piece with a degreasing cleaner.
- Sand lightly so the paint can grip.
- Wipe away the dust and apply a primer.
- Paint with two thin coats, letting each dry fully.
- Seal with a clear topcoat if the piece will see heavy use.
If you like a wood look, you can paint a piece with a faux stain technique, which means you can skip the messy chemical stripper. Facebook Marketplace and estate sales are great places to find solid wood pieces for low prices.
Repurpose a Piece for a New Job
Do not be afraid to give furniture a different job than it was built for. One blogger created a custom looking entertainment center using two laminate bookcases and an old dresser, which filled a large wall for a small portion of the cost of a new unit. A dresser can also become a media console, and a bar cart can work as a side table that holds a lamp and books.
Use Spray Paint on Small Items
Spray paint is one of the cheapest ways to change a room. Use it on table lamps, picture frames, candle holders, door knobs, and small side tables. Clean the item, use a primer made for the material, and spray in light, even coats from about 10 inches away. Two light coats always look better than one thick coat.
Add Storage That Hides the Mess
Small living rooms need closed storage, which hides everyday items behind doors. If you can build or buy a bookcase with cabinet doors on the bottom, you get display space on top and hidden space below. Baskets under a coffee table or ottoman work too, and a storage ottoman gives you a seat, a footrest, and a place for blankets all in one.
Build or Borrow Built In Looks
Built in shelving around a sofa or window can use awkward corners and give you floor to ceiling storage. A budget version is to place two matching bookcases on either side of a window or fireplace and add trim across the top. Paint everything one color, and it reads as built in.
Small Living Room Ideas That Make the Space Feel Bigger
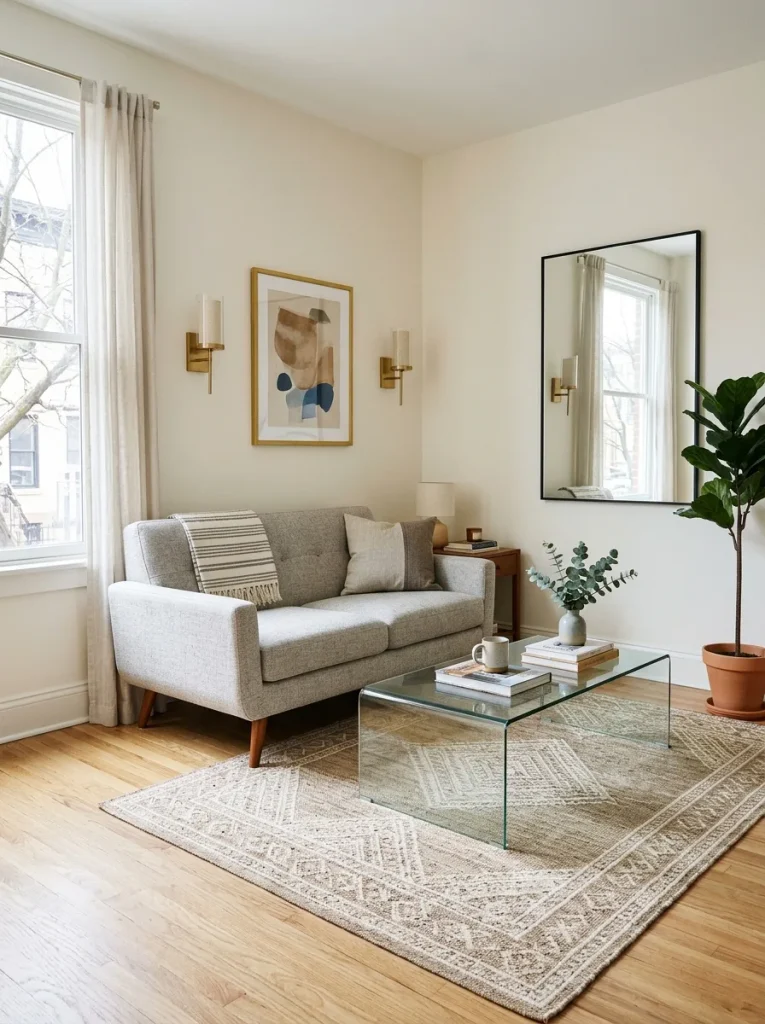
If your room is compact, these small living room ideas help you get more from every foot. Most of them come from HGTV design experts and work with the DIY projects above.
Scale Down Your Furniture
Oversized, overstuffed furniture can shrink a room faster than anything else. Choose narrow, tailored pieces such as a loveseat instead of a full sofa, a slim coffee table, or two small chairs in place of a second sofa. One designer even suggested four smaller chairs in place of a bulky sofa, so everyone gets a seat and the floor stays open.
Pick Pieces That Show Floor
Look for furniture with thin legs and open bottoms. When you can see the floor under a sofa or cabinet, your eye reads more space. Glass or acrylic coffee tables work for the same reason, since they almost seem to disappear.
Choose Dual Purpose Furniture
Pieces that do two jobs earn their space. Ottomans can be a coffee table, extra seating, and storage. A sleeper sofa turns the room into a guest bedroom at night. Nesting tables and light end tables can be rearranged in minutes, which lets you change the layout for movie night or a party.
Use Light and Mirrors
A well placed mirror adds depth and bounces natural light around the room. Place one across from a window, or lean a large floor mirror against a wall. If you have no room for table lamps, mount wall sconces on both sides of the sofa so lighting does not take up floor space. Plug in sconces or choose battery versions if you cannot wire them.
Define the Room With a Rug
A rug that is too small makes the room look broken up. Choose one large enough that all four legs of your sofa, chairs, and coffee table sit on it. This anchors the seating area and marks the edge of the living space, especially in an open plan home. Layer a smaller rug on top of carpet if you do not like the floor you have.
Go Low and High
Low furniture paired with tall shelves pulls the eye up toward the ceiling and makes the space feel larger. Use tall bookcases and long vertical art to add height, and keep the center of the room open.
Keep a Calm Base
A pale, simple base lets you add color through accessories without making the room feel crowded. Even a colorful living room can feel open when the walls, trim, and large furniture are all one light shade.
Declutter With a Simple Rule
Small items can make a room feel messy. One easy rule is to remove any decor smaller than a cantaloupe unless it is something you truly love. Group the items you keep in odd numbers on trays so they look intentional. On your coffee table, less is better: a tray, a candle, and a small stack of books is plenty.
How to Make a DIY Living Room Look Expensive
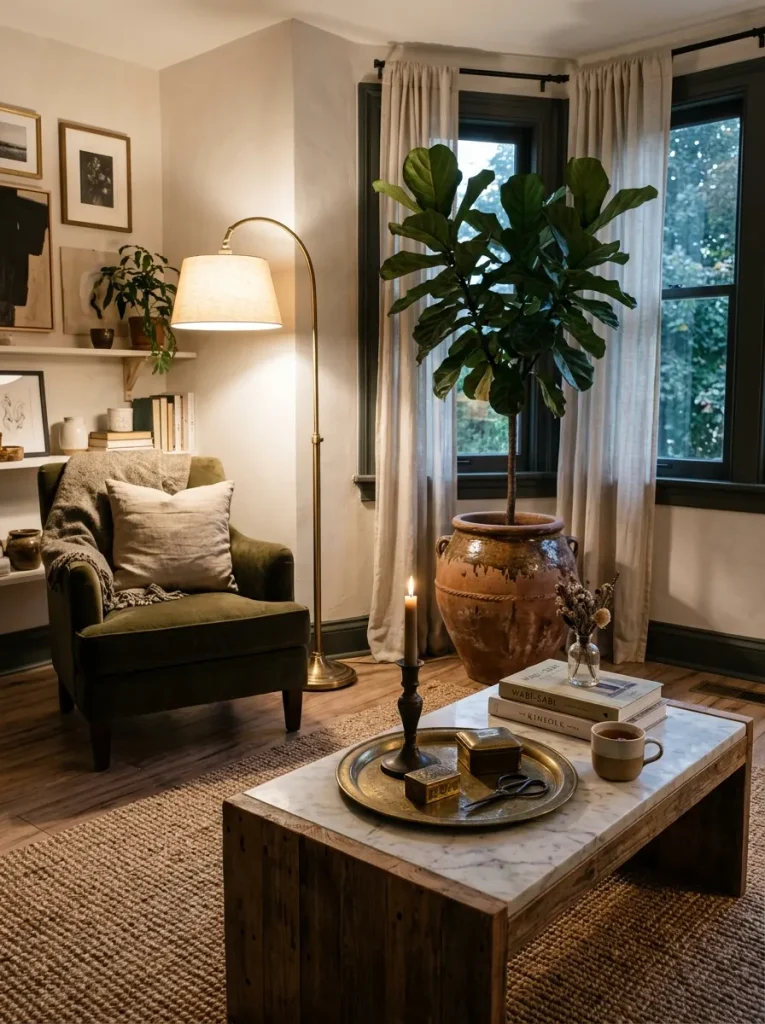
You can borrow tricks from high end homes without paying high end prices. These ideas come from designers and home writers who have tested them in real rooms.
Go Big With One Statement Piece
Many luxury homes have a large potted tree in the living room. One writer found a very large plaster planter on a resale site and paired it with a faux tree to add instant drama. The lesson is that going big in one or two places looks richer than filling a small room with tiny items. A large mirror, an oversized lamp, or a big piece of art works the same way.
Mix Materials and Textures
A room that matches too closely can feel like a showroom set. Instead, combine different finishes: a wood credenza, a marble and brass coffee table, a jute rug, and striped lamp bases. Everything should be in the same color family, but the textures should vary. This layered look is what makes a room feel collected over time.
Add Vintage and Secondhand Finds
Vintage trays, candle holders, and bar accessories bring character that mass produced decor cannot match. Flea markets, estate sales, and online resale sites are good places to look, and some pieces cost only a few dollars. Build your collection slowly and pick items that mean something to you.
Choose Affordable Original Art
Original art does not always cost a lot. Look for sketches at flea markets, abstract paintings from small vintage sellers, or pieces by local art students. A nice frame and good lighting will do the rest.
Use Warm, Low Lighting
Bright overhead lights make a room feel flat. Designers say people on any budget should use lamps and low light to show off their favorite objects, whether those objects are cheap or costly. Use warm bulbs, place lamps at different heights, and add a few candles for a soft glow in the evening.
Pay Attention to Small Details
Small flaws cheapen a room fast. Fill old nail holes with spackle, touch up scuffs, and wash dusty baseboards. Replace worn outlet covers, and consider painting dated doorknobs with spray paint. Deep clean your rugs and upholstery too, since tired fabric can pull down an otherwise lovely room.
Arrange Decor Like a Stylist
When styling a console or shelf, start with the tallest item as your focal point, then add medium and small pieces around it. Vary heights, leave some space, and repeat a color or shape two or three times. Add something living, like a plant or fresh flowers, to finish the look.
A Simple Weekend Plan
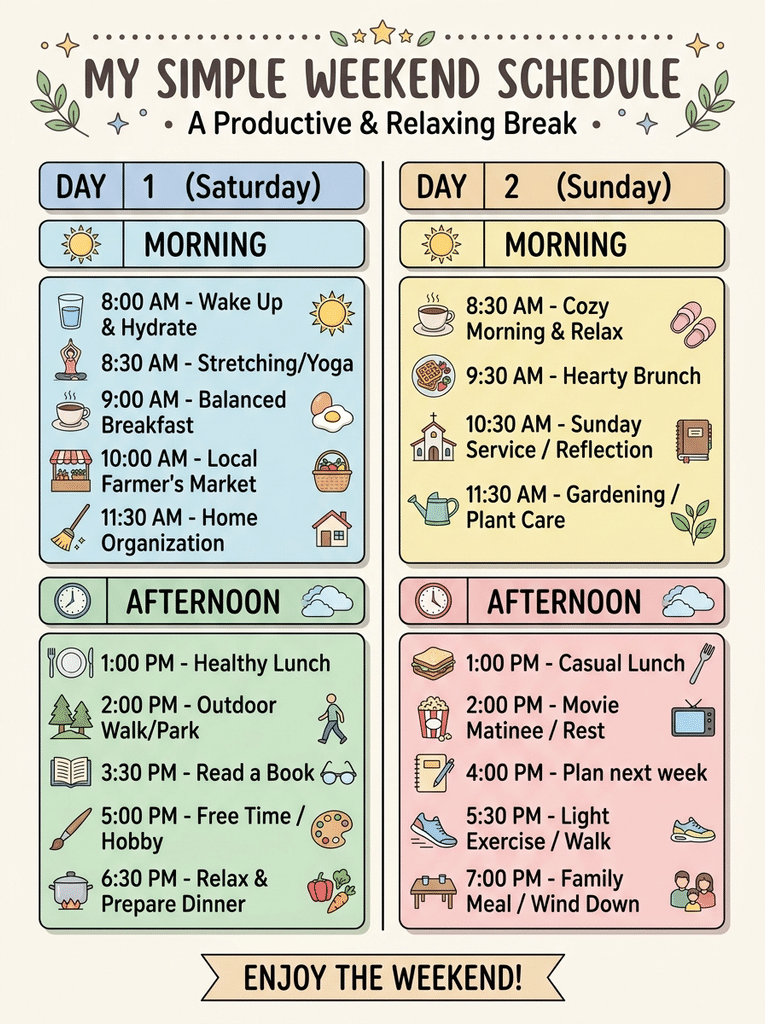
If you are not sure where to begin, try this order, which builds momentum and keeps the work manageable.
- Day 1 morning: declutter, deep clean, and rearrange the furniture.
- Day 1 afternoon: patch holes and paint the walls or one accent wall.
- Day 2 morning: hang curtains higher and install your gallery wall or ledges.
- Day 2 afternoon: make pillow covers, style your coffee table, and add a mirror or a plant.
Save larger projects, like picture frame molding or a furniture makeover, for the following weekend.
Frequently Asked Questions
How can I decorate my living room on a small budget?
Start with free changes like decluttering and rearranging furniture, then add low cost updates such as paint, printable wall art, thrift store frames, and DIY pillow covers. Shop secondhand for furniture and decor, and refinish pieces you already own. Spend your money on the items people notice most, such as a good rug or lighting.
What is the easiest DIY project for a living room?
The easiest projects are swapping pillow covers, hanging a mirror, and rearranging your furniture. If you want something a bit bigger, try a ledge gallery wall or a fabric wall hanging, since both can be finished in one afternoon with basic tools.
How do I make a small living room look bigger?
Use light, neutral wall colors, hang curtains close to the ceiling, add mirrors, and choose furniture with slim legs. Pick a few smaller pieces in place of one bulky one, use a rug large enough to anchor the seating, and keep surfaces clear. Wall sconces and vertical art also save floor space.
What colors work best for a living room?
Soft neutrals like greige, warm white, and pale gray make most rooms look bright and open. Add color with pillows, art, and plants so you can change the look easily. If you want boldness, paint one accent wall or the ceiling.
Can renters try these DIY living room ideas?
Yes. Renters can use picture ledges, damage free hanging strips, peel and stick wallpaper, removable adhesive trim, large rugs, new pillow covers, lamps, and plants. Always check your lease before painting or drilling.
Conclusion
A beautiful living room does not require a big budget. It comes from a clear plan, a few smart projects, and the willingness to start. The right living room decor can transform your space without spending a fortune. Pick one idea from this guide, such as a fresh coat of paint, a DIY gallery wall, or handmade pillow covers, and finish it this weekend. Then take a photo, enjoy the change, and move on to your next project.
Ready to begin? Choose your first project from the list above, gather your supplies, and start today. Your living room will thank you, and you will be proud every time you walk in.